

For that matter, I’ll create a file server of two types: “File server for general use” and Scale-Out File Server. For the latter, I’ll have two scenarios: VMs running and off. After that, I’m gonna evaluate the deduplication ratio using a free tool – StarWind Deduplication Analyzer. And finally, run data deduplication using the Windows Server 2016 Data Deduplication feature. We also need our storage shared, so for this purpose, I’ve decided on StarWind Virtual SAN Free.
HERE IS THE ENVIRONMENT CONFIGURATION:
Host 1:
- Intel Xeon E5-2660 v2
- 128GB RAM DDR3
- 1x HDD Seagate 1TB
- 1x HDD WD Black 1TB
- 1x Intel gigabit 4p i350-t rndc 1Gb\sec
- Mellanox ConnectX-3 network adapter 10Gb\sec
Host 2:
- Intel Xeon E5-2660 v2
- 128GB RAM DDR3
- 1x HDD Seagate 1TB
- 1x HDD WD Black 1TB
- 1xIntel gigabit 4p i350-t rndc 1Gb\sec
- Mellanox ConnectX-3 network adapter 10Gb\sec
For management, I’ve used the network: 172.16.0.0/24.
Network adapter – 1Gb/sec Intel gigabit qp i350-t rndc.
For StarWind VSAN Free synchronization, I’ve used an additional network: 10.0.0.0/24.
Network adapter – 10Gb/sec Mellanox ConnectX-3.
OS: Windows Server 2016 Version 1607 (OS Build 14393.0).
For working with file servers, I’ve joined the hosts into a domain under Active Directory administration.
Here is the network interconnection diagram:

TOOLKIT USED
StarWind VSAN Free. Basically, it’s a Software-Defined Storage solution that mirrors internal server resources between the participating cluster nodes, thus delivering a highly available shared storage. Why StarWind VSAN Free? Well, obviously it costs nothing and simply gets the job done. The version used is v8.0.0.11818. You can find more info about the software on the company’s official website: https://www.starwindsoftware.com/starwind-virtual-san-free
Data Deduplication. Data Deduplication is a feature of Windows Server 2016 allowing to optimize free space on a volume by investigating the data for duplicates. When a duplicated element is found, it gets replaced with a pointer to a unique copy of that chunk, thus freeing storage space. Data Deduplication optimizes redundancies without compromising data fidelity or integrity. For additional information, please visit the Microsoft official website: https://docs.microsoft.com/en-us/windows-server/storage/data-deduplication/overview
StarWind Deduplication Analyzer. Another free tool from StarWind, which analyzes the data on your storage and estimates the savings you get when running deduplication on the data volume. Again, it’s free of charge and it can come in handy when you’re planning on deduplication but not sure of the benefits you’ll get with it. The used version is v2.0.0.2. In case you need more info on this tool, follow this link: https://www.starwindsoftware.com/starwind-deduplication-analyzer
FILE SERVER TYPES
File server for general use. This type of clustered file server allows providing shared access to files in a failover cluster. It sometimes is referred to as active-passive or dual-active. This type of failover server is recommended for sharing data between the employees.
Scale-Out File Server (SOFS). This clustered file server has made its first appearance in Windows Server 2012. It allows storing server applications’ data such as Hyper-V VM’s files. All file resources are simultaneously online on all nodes. The shared file resources connected with that type of clustered file server are called scale-out file shares. Such configuration is sometimes called active-active. This file server type is recommended for storing Hyper-V or Microsoft SQL Server data.
You can find more info on file server types at the Microsoft official website:
Now, let’s switch from theory to practice and do some real work.
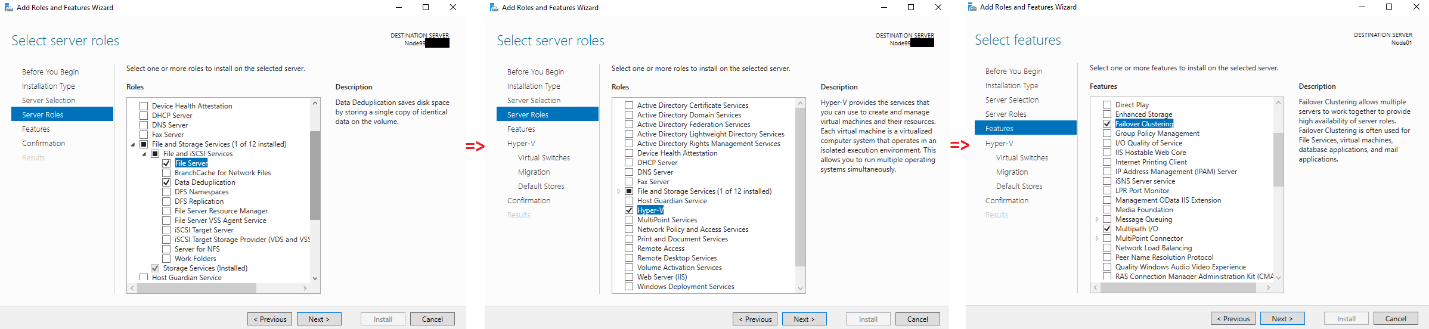
INSTALLING THE REQUIRED SERVICES
I’ll need to install the following services: File server, Data Deduplication, and Hyper-V.
Also, I’ll need Multipath I/O and Failover Clustering features deployed.
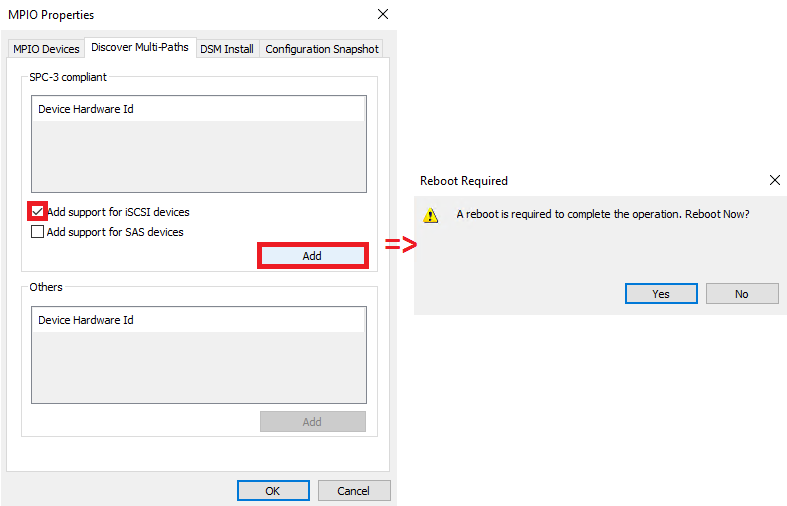
ENABLING MPIO
Now, I need to enable the support for iSCSI devices in the Discover Multi-Paths tab.
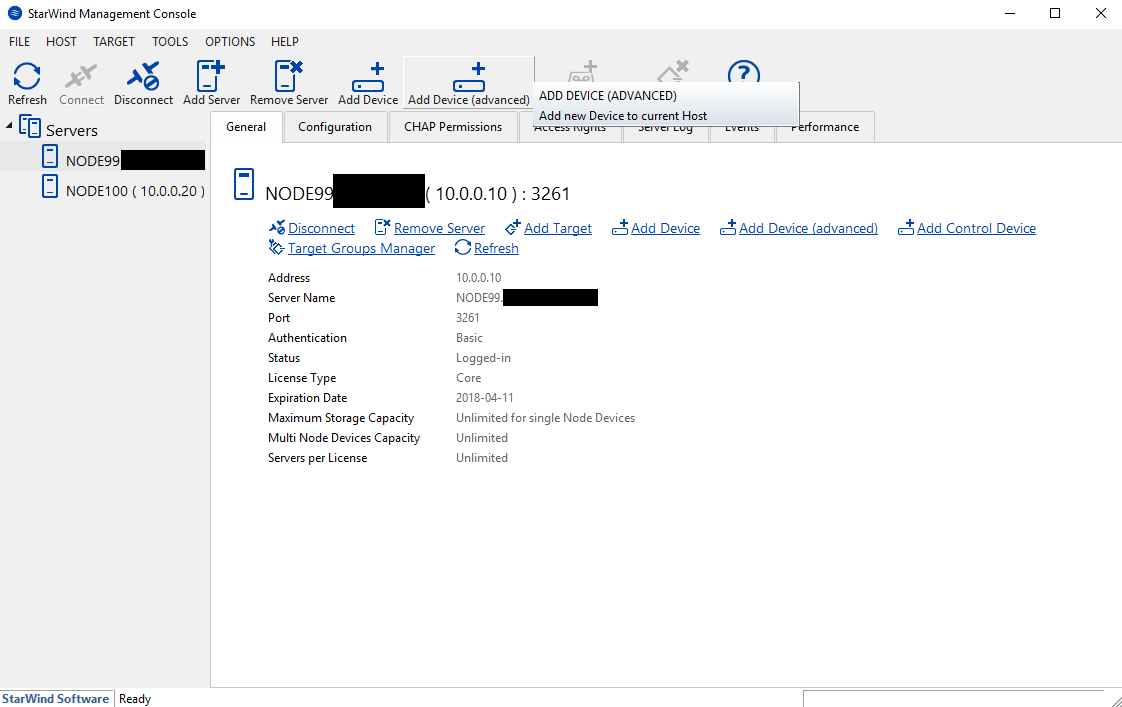
CREATING DEVICE
First, I’ve installed StarWind VSAN Free on Host 1 and Host 2. Next, on Host 1, in StarWind Management Console, I’ve added both Hosts.
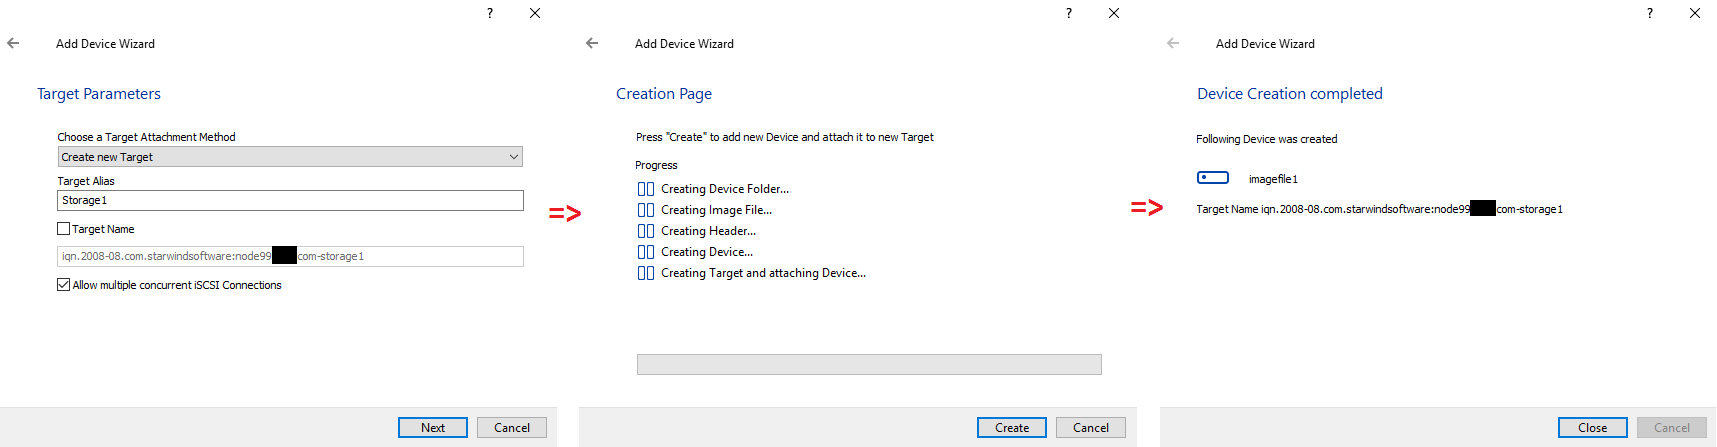
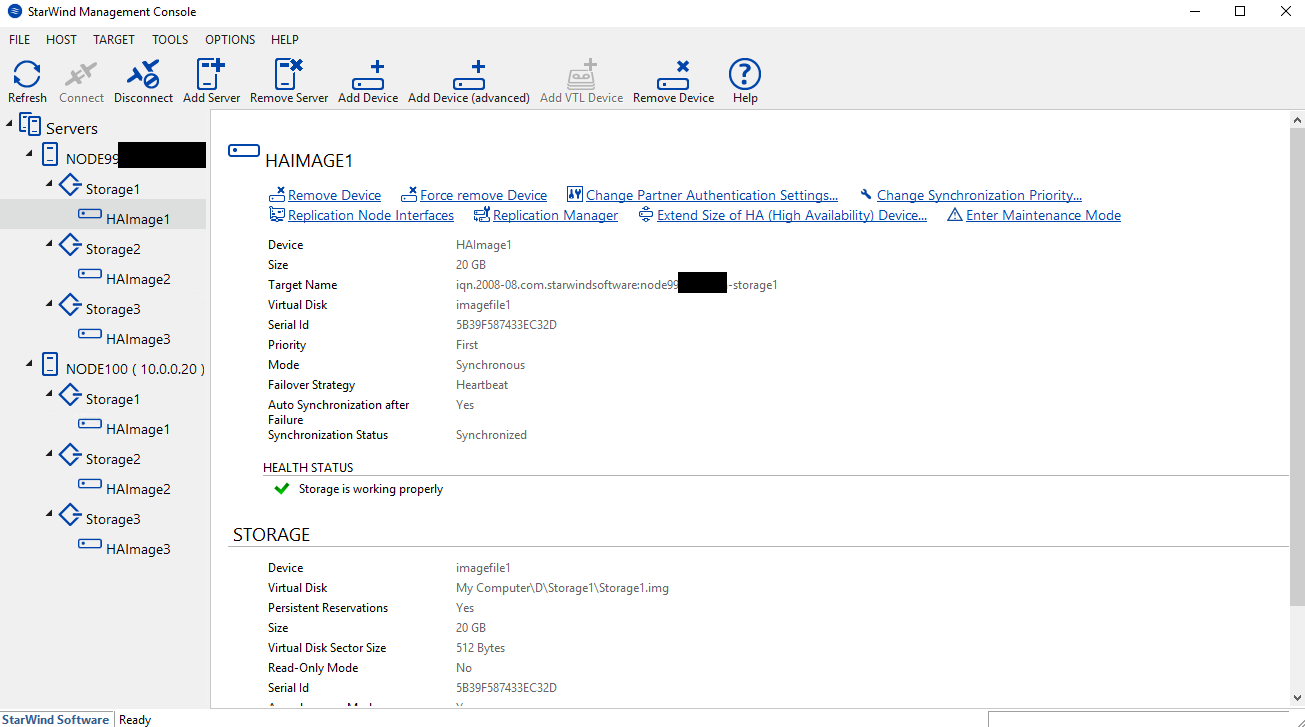
Next, create the device and set its size.
Now, I need to create a synchronized partner in Replication Manager.
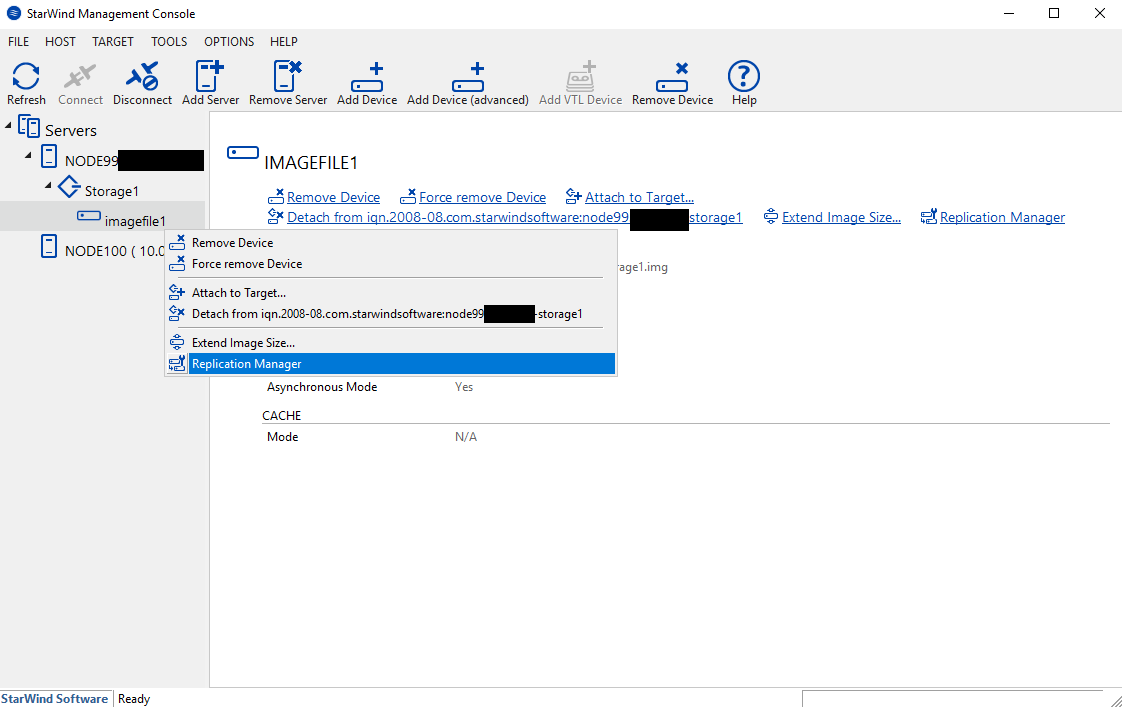
Create a replication partner.
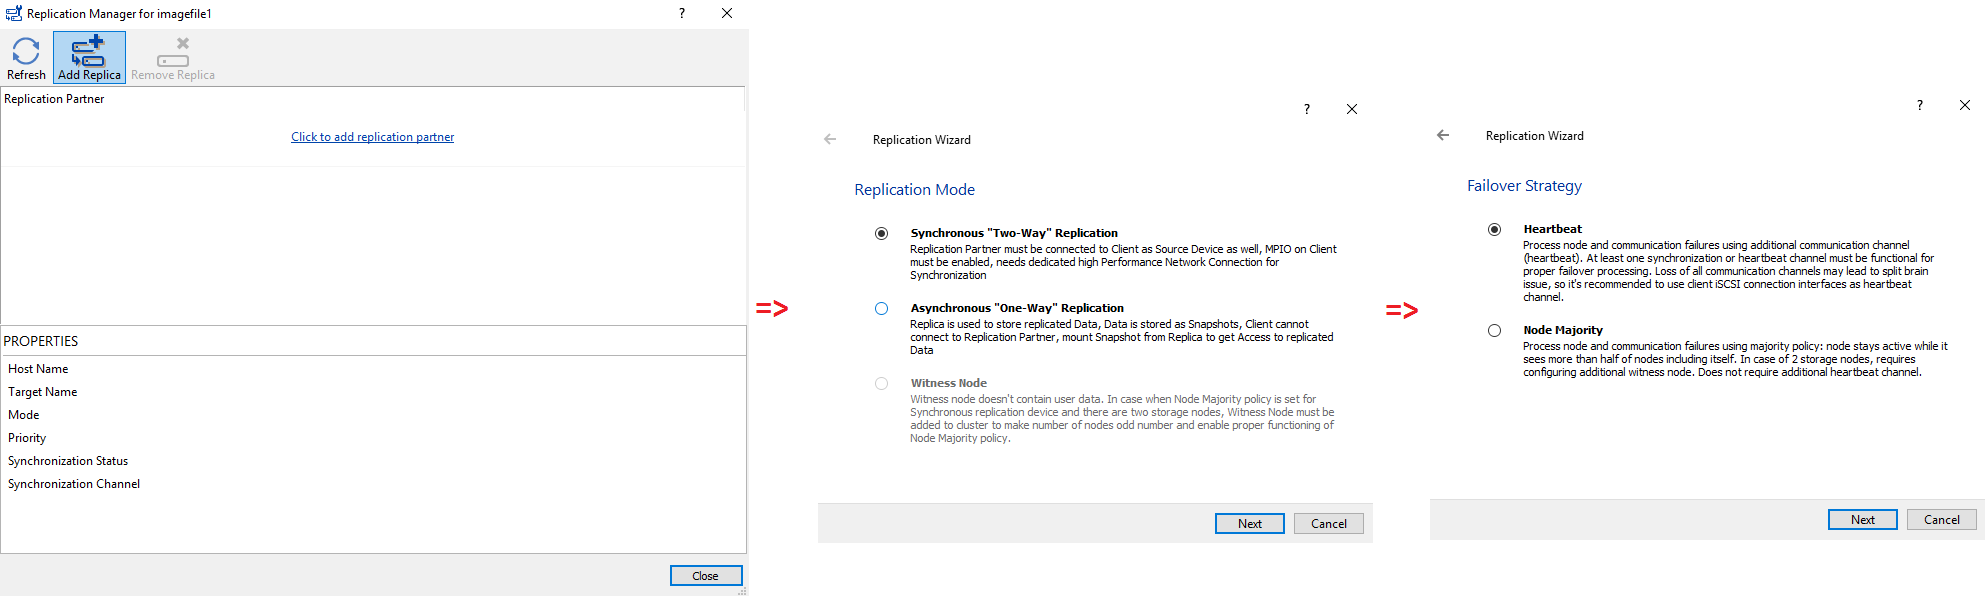
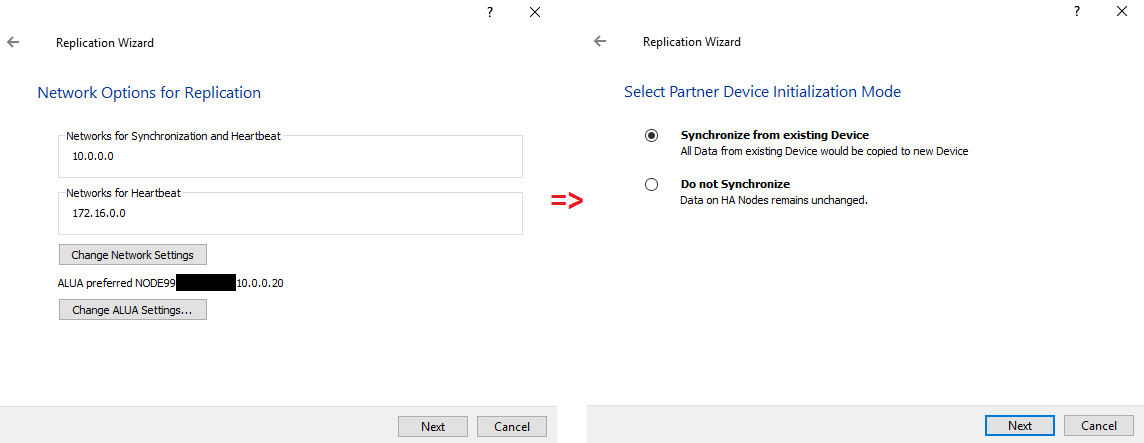
Next, configure the networks and specify the partner device initialization mode.
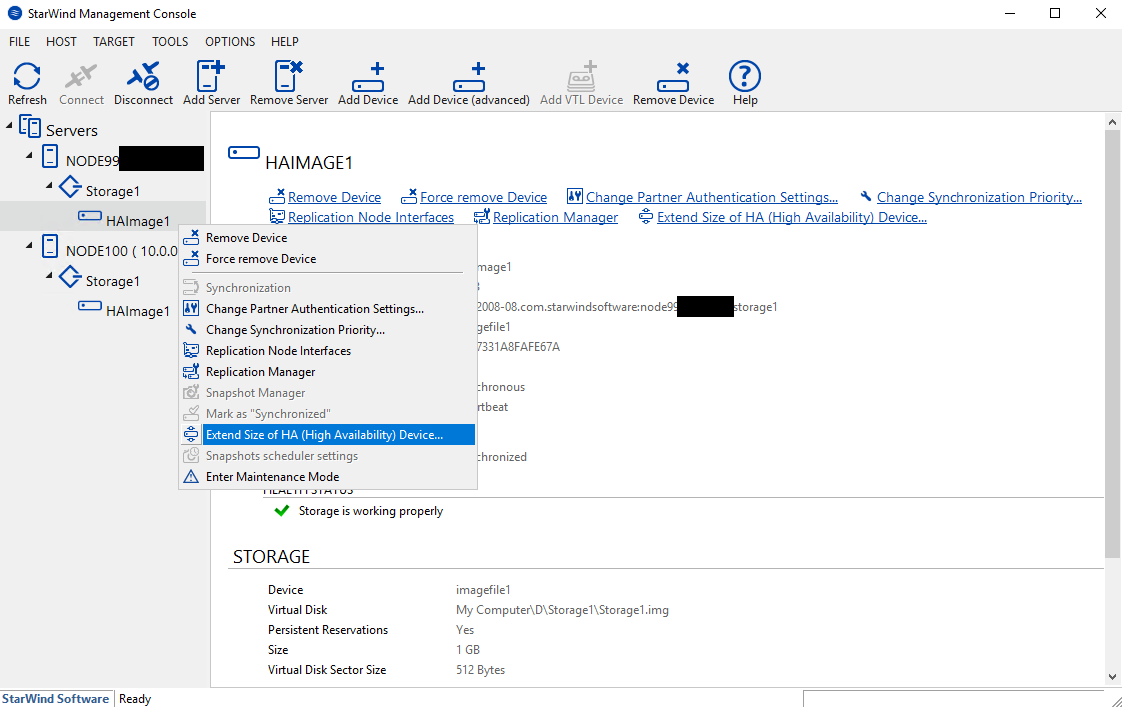
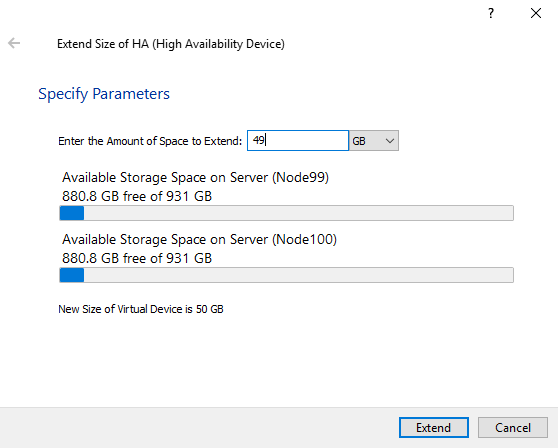
Now, by clicking “Extend Size of HA”, I’m increasing the total capacity of the HA device on a fly.
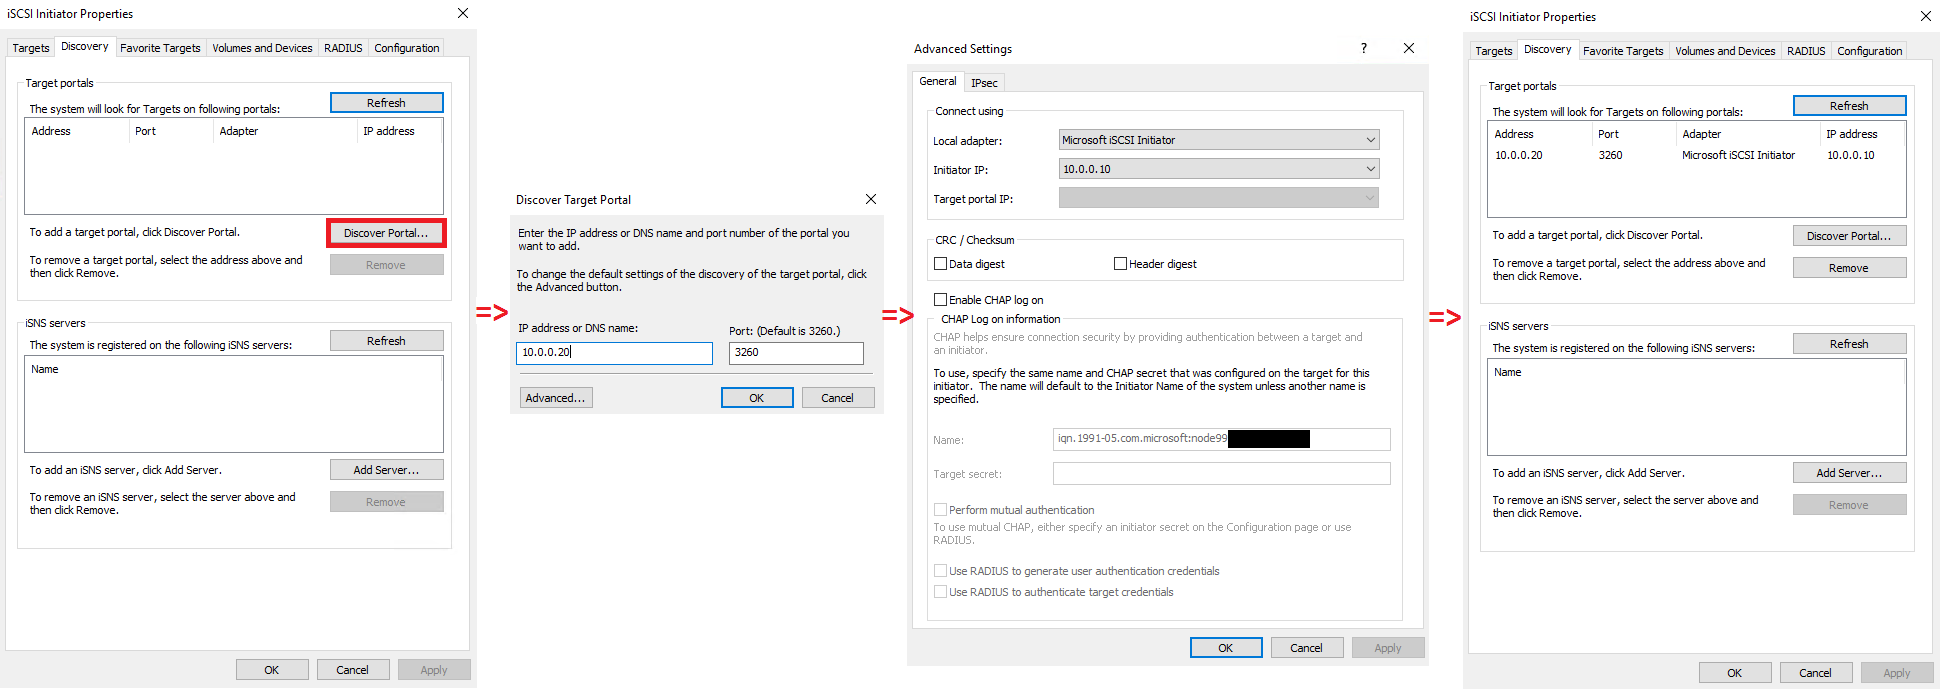
CONFIGURING ISCSI INITIATOR
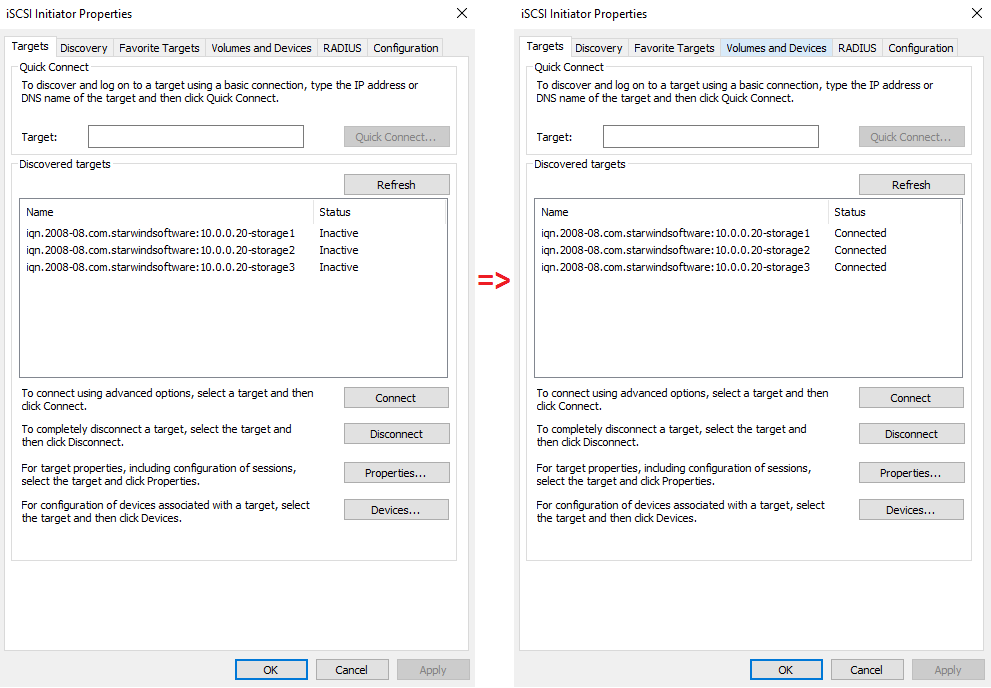
In this part, I’m going to discover the partner IPs on both nodes.
Configuring iSCSI Initiator on Host 1.
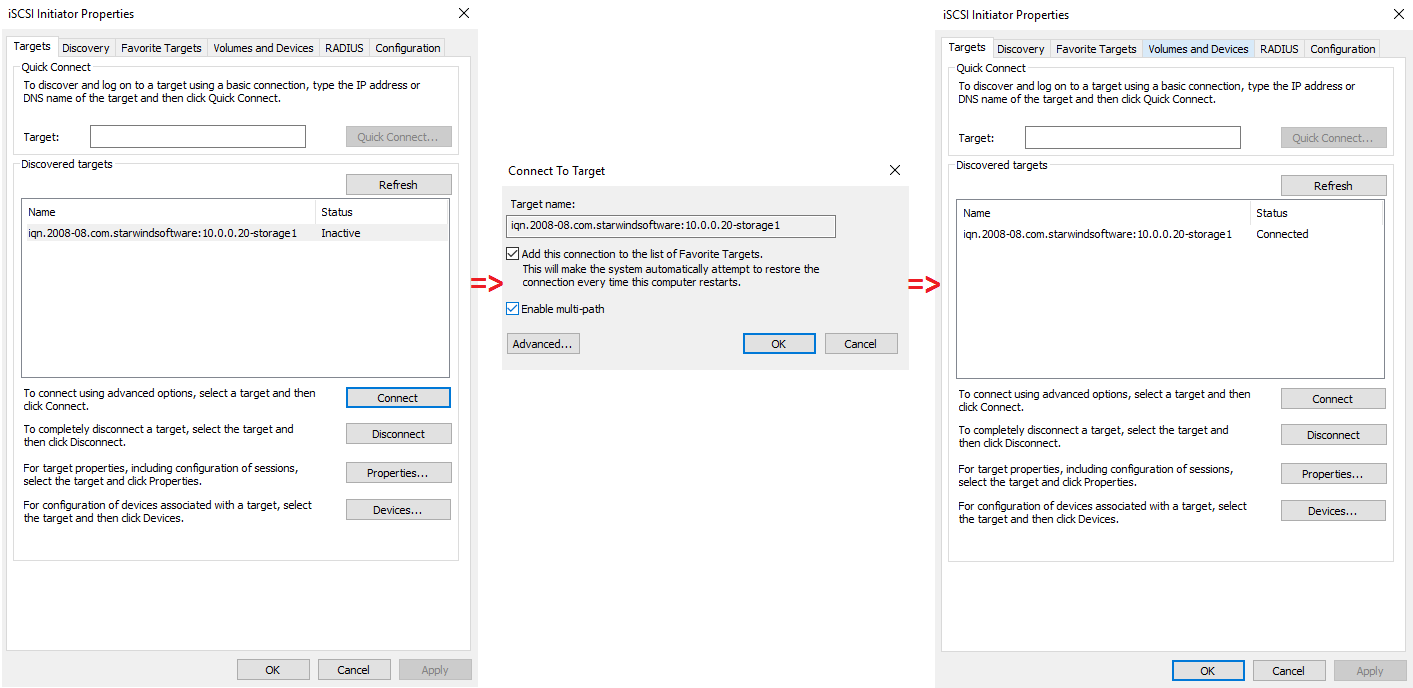
Now, connect the iSCSI target in the Targets tab.
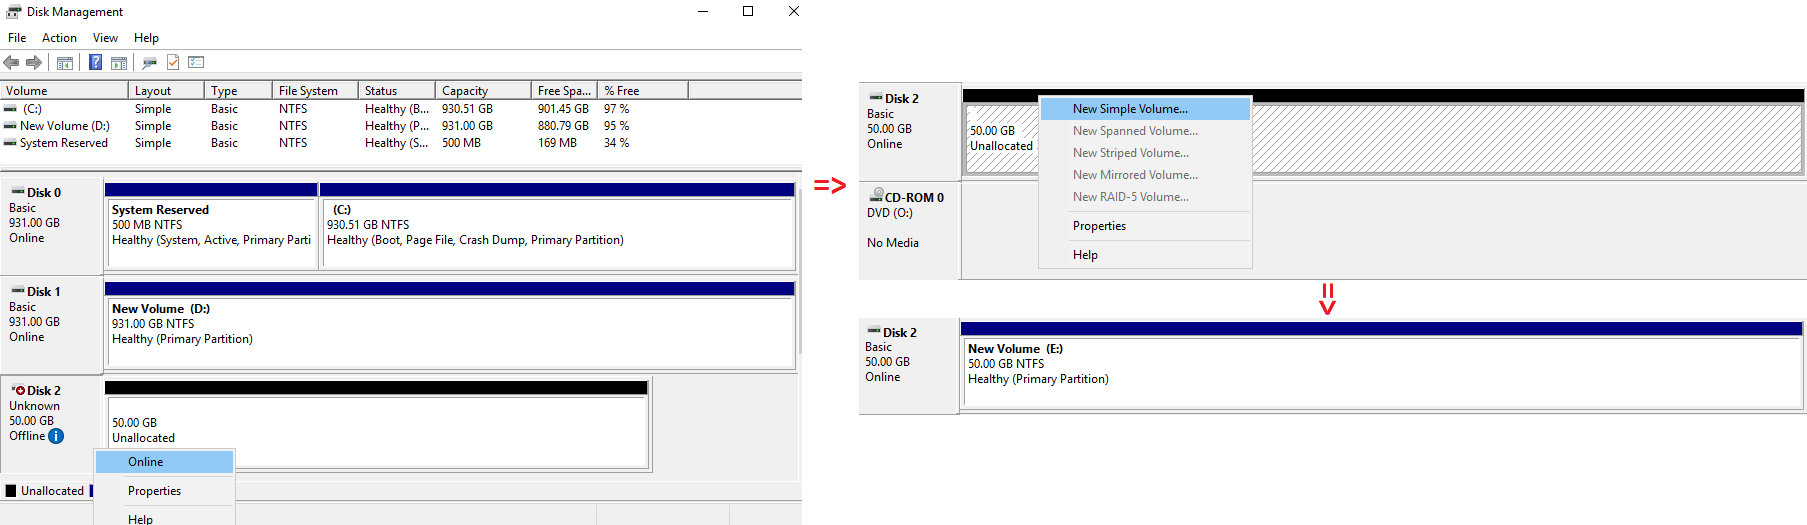
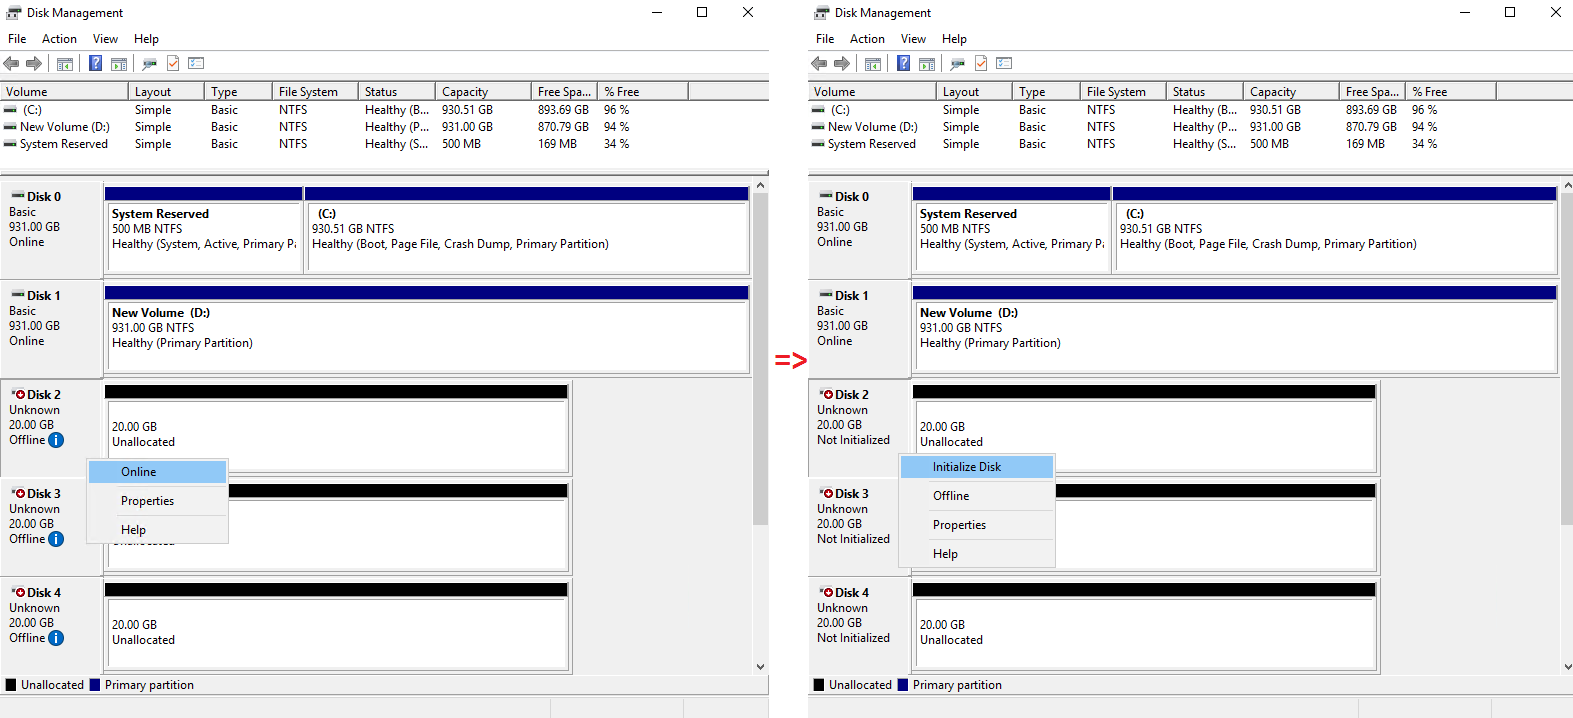
The connected disk was formatted as NTFS via Disk Management console.
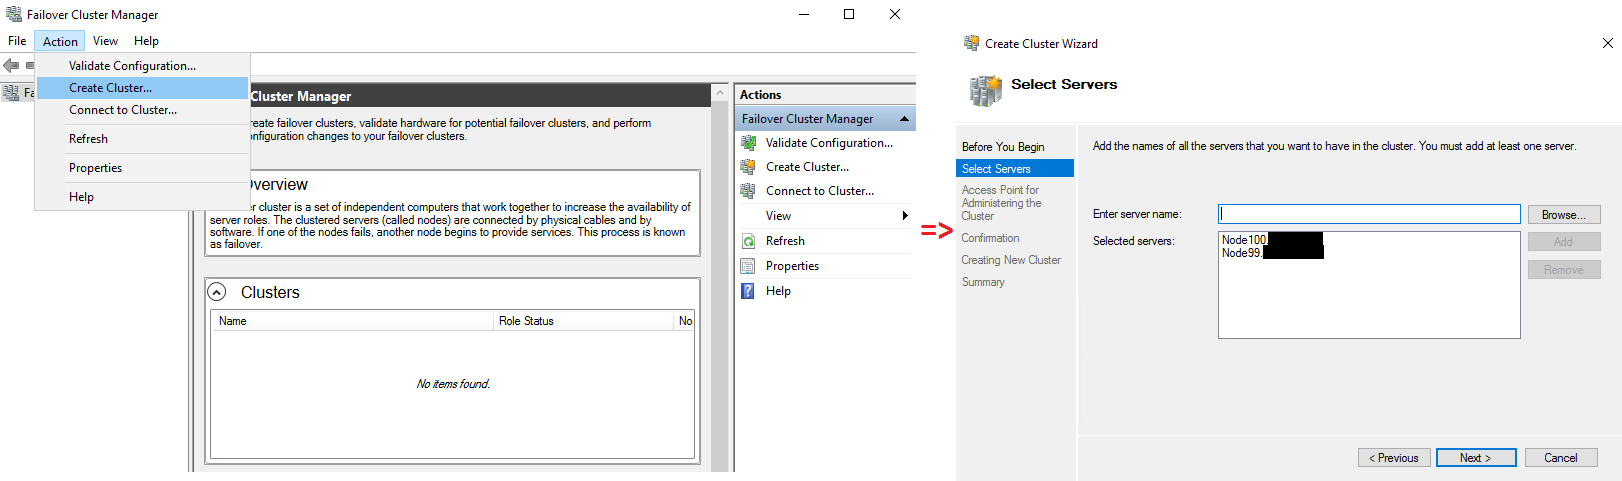
CREATING A CLUSTER IN FAILOVER CLUSTER MANAGER
OK, open Failover Cluster Manager and click Create Cluster in the Action tab. After that, specify the hosts to be added.
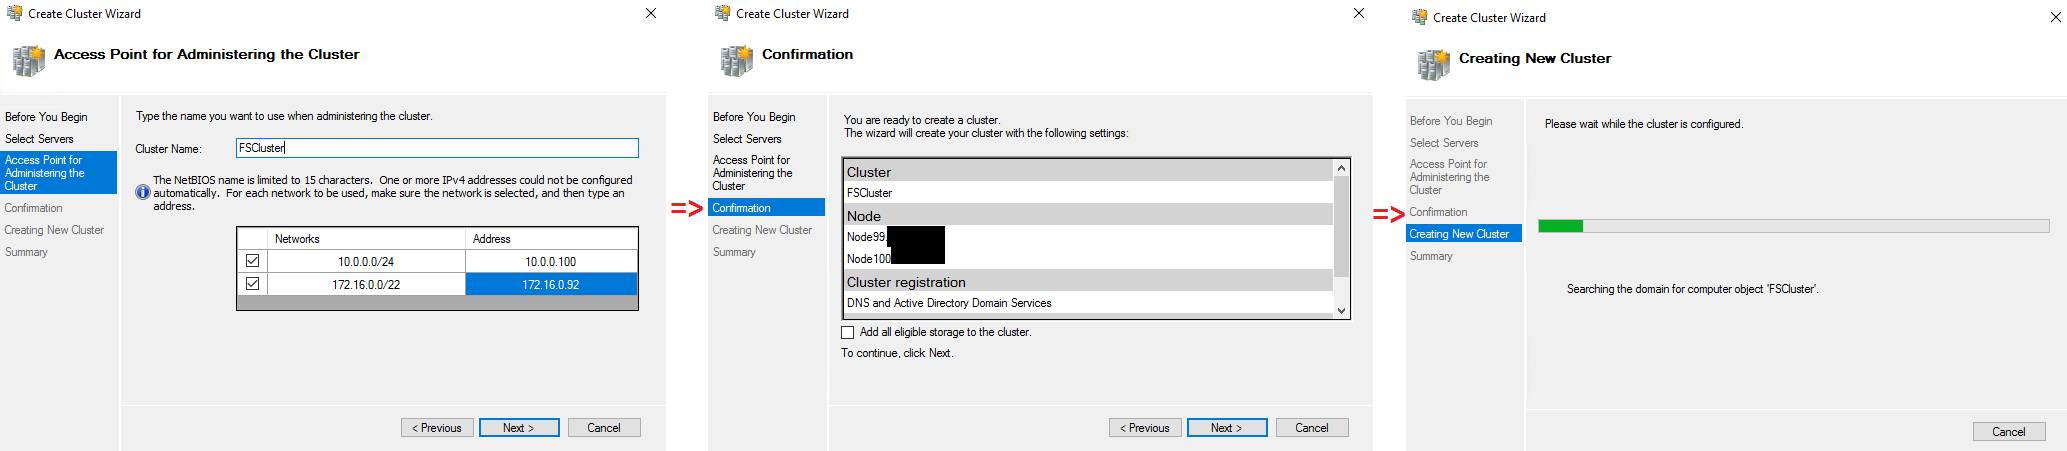
Now, specify the name and confirm the cluster creation.
Go to the Disks tab and add the cluster disk.

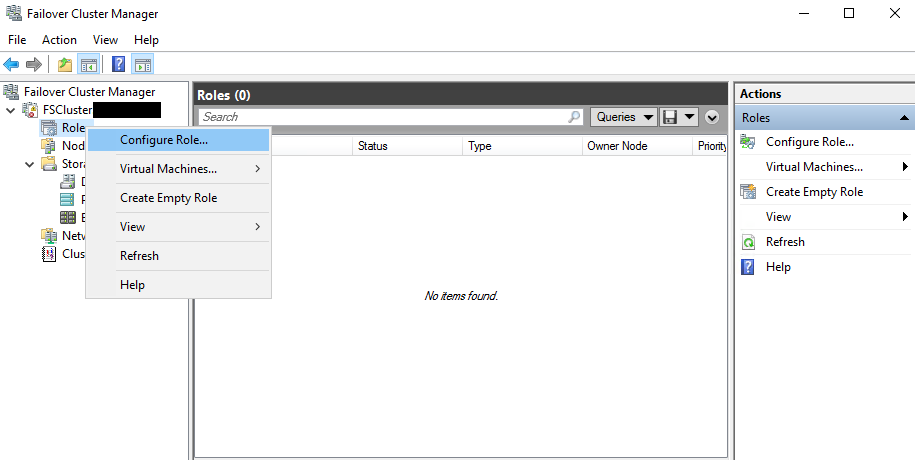
CREATING “FILE SERVER FOR GENERAL USE”
For that matter, navigate to the Role tab and choose Configure Role.
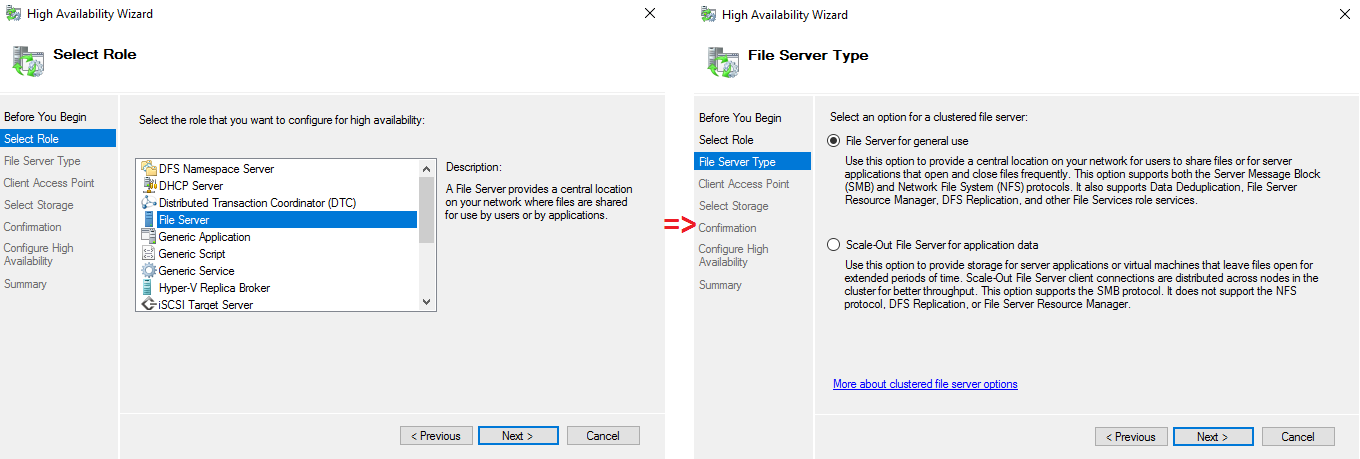
Select the role and the file server type.
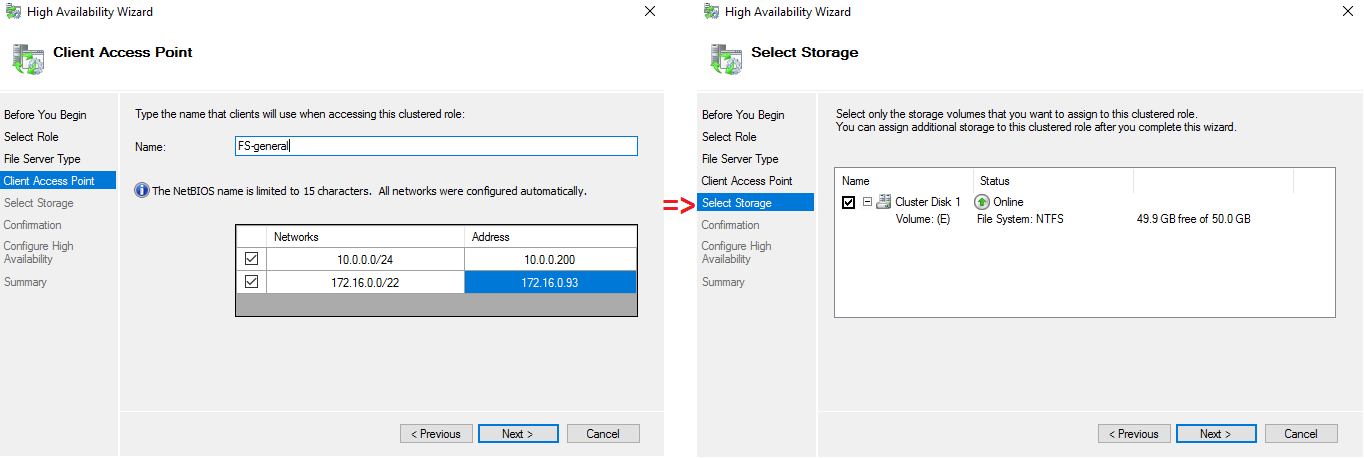
Select the name and storage for “File server for general use”.
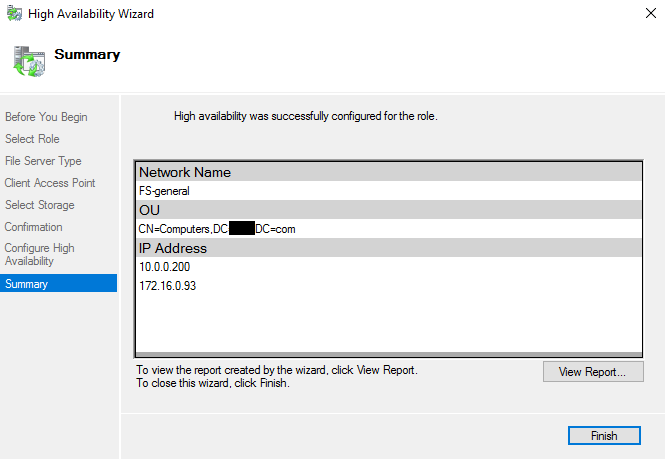
All is ready, you can see the summary in the screenshot below.
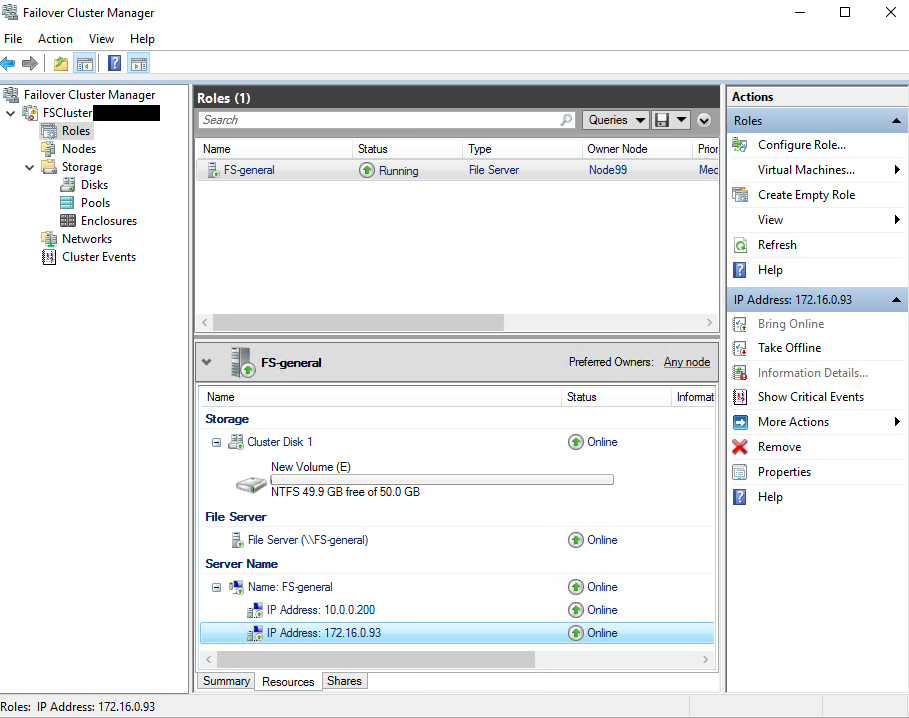
Finally, “File server for general use” is good to go.
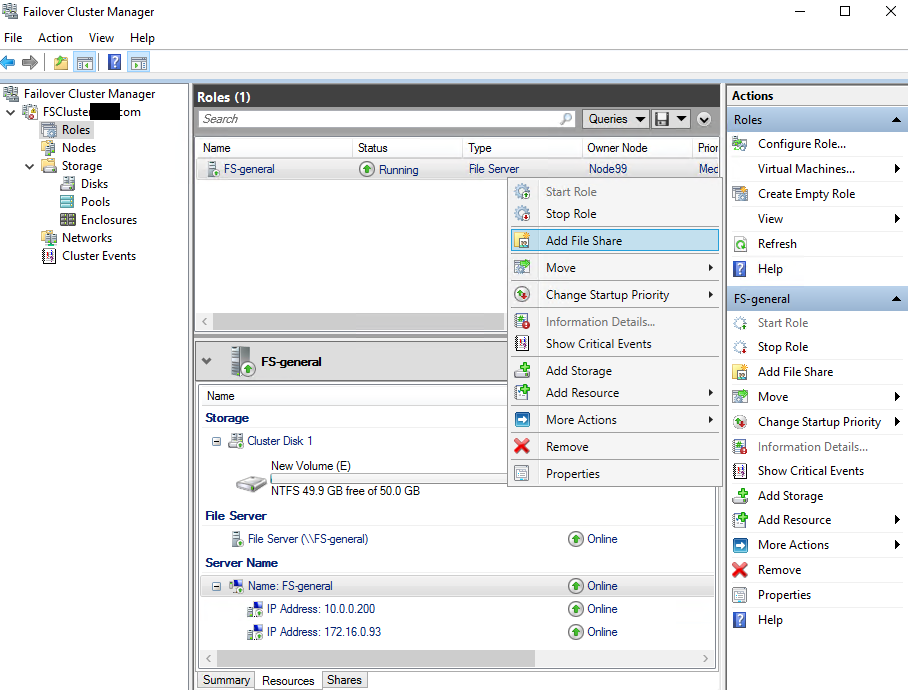
Now, let’s add a File Share to the File server.
Select the profile and the file share location.

Specify the share name and confirm the settings.
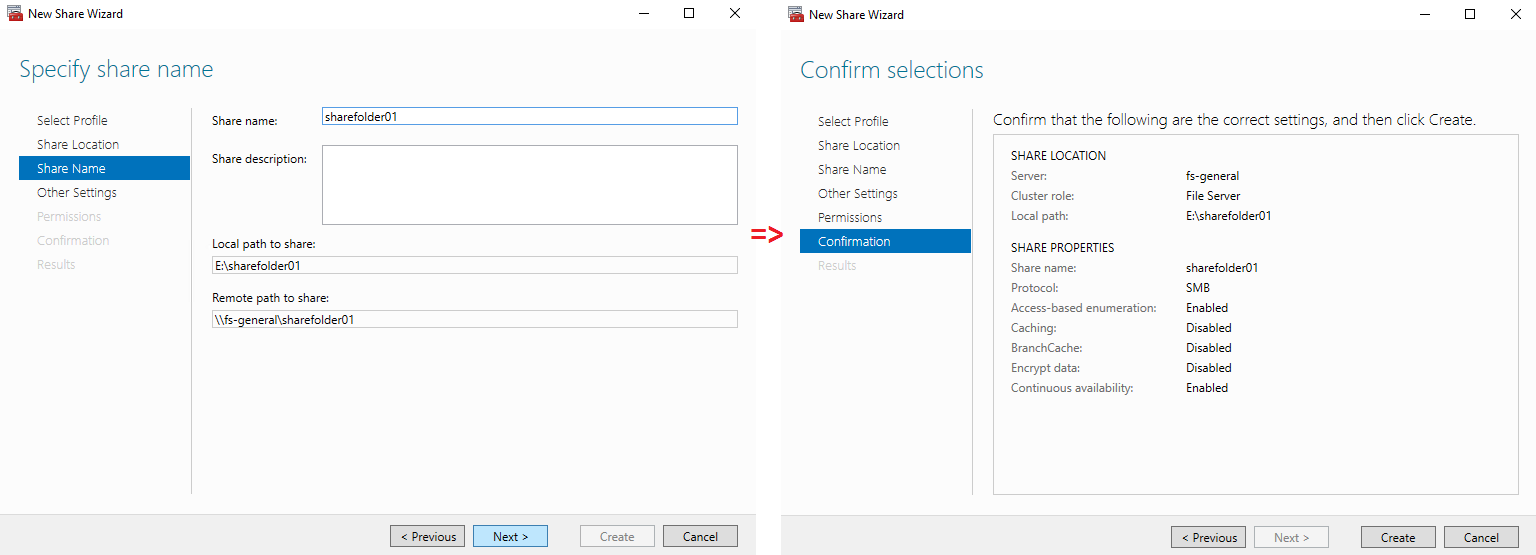
You can see the result in the screenshot below.
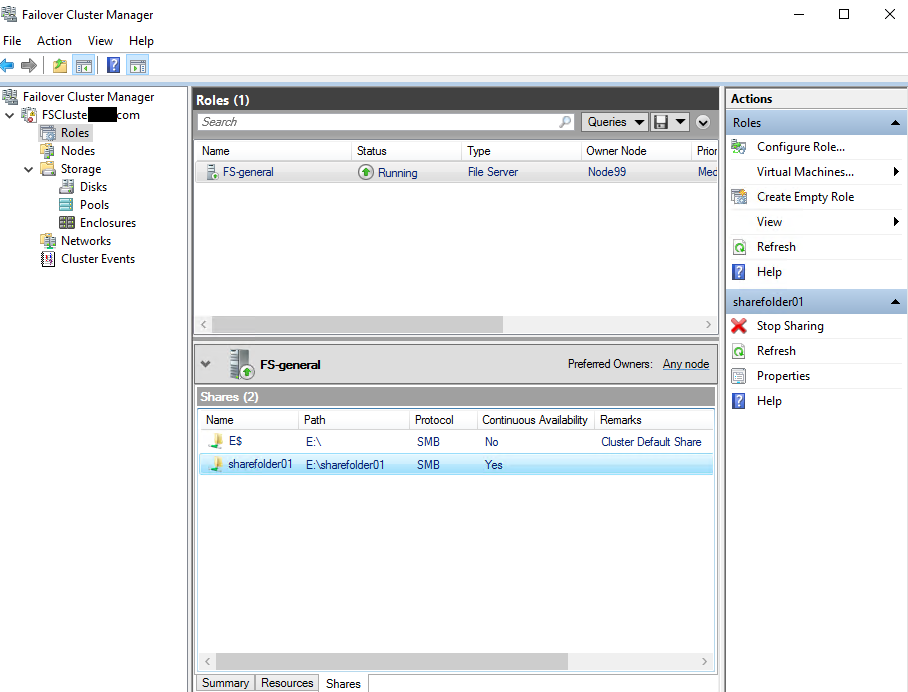
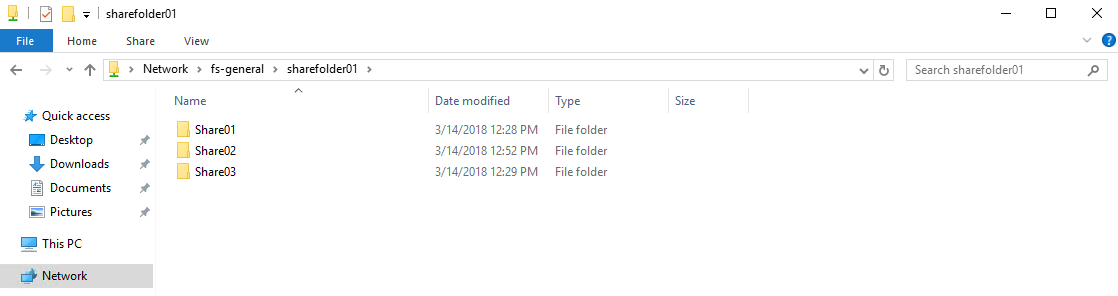
Finally, connect to the “File server for general use” the network.
Now that we’re done with “File server for general use”, we can go on and proceed with deduplication. I’ll configure the Scale-Out File Server later step-by-step not mix things.
DEDUPLICATION
Prior to enabling deduplication on the File server, I’ve copied Fonts files from “С:\Windows\Fonts” folder several times to give some work for Data Deduplication.
So, I’ve run deduplication analysis using the StarWind Deduplication Analyzer tool.
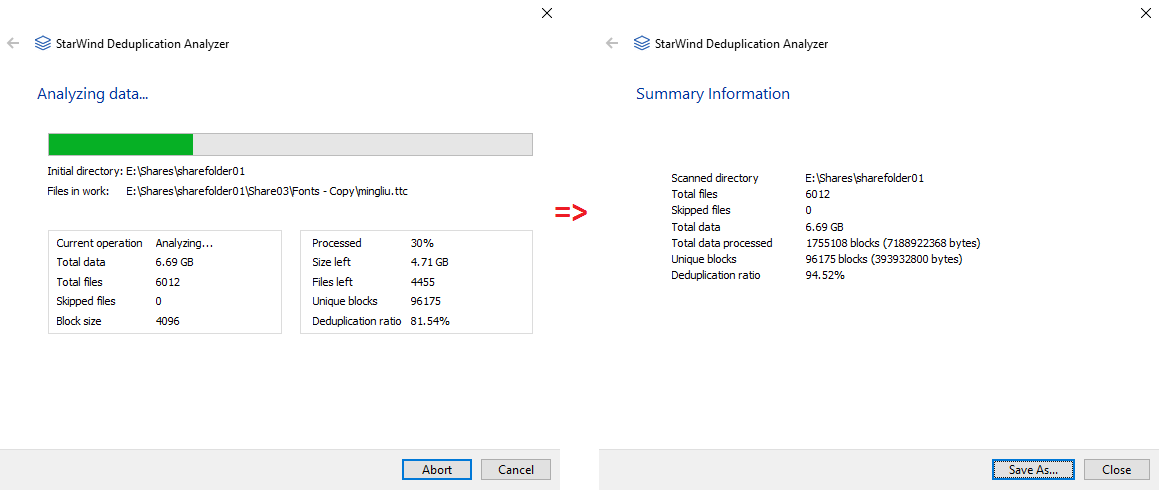
As you can see from the screenshot above, StarWind Deduplication Analyzer estimated the deduplication ratio of 6,69GB as 94,52%.
Prior to running deduplication, I need to configure the Data Deduplication feature.
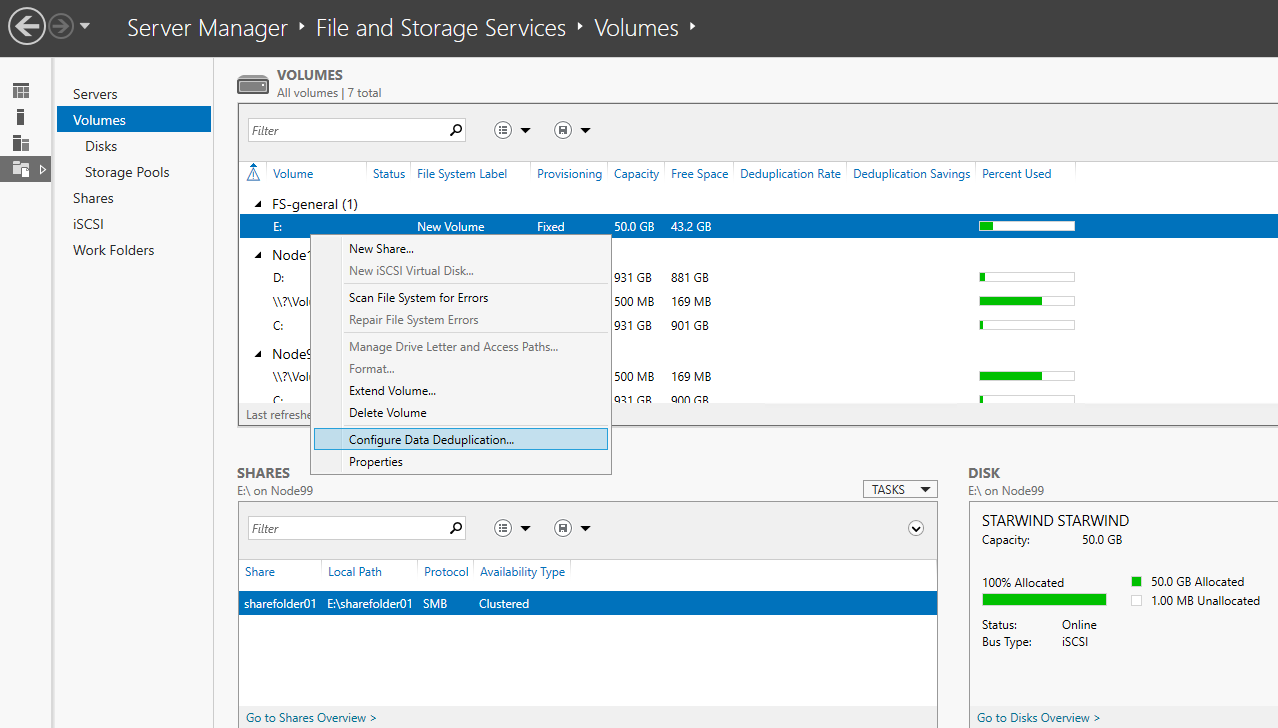
Open Server Manager => File and Storage Services => Volumes, right-click on the “File server for general use” volume and choose Configure Data Deduplication.
Select “General purpose file server”.
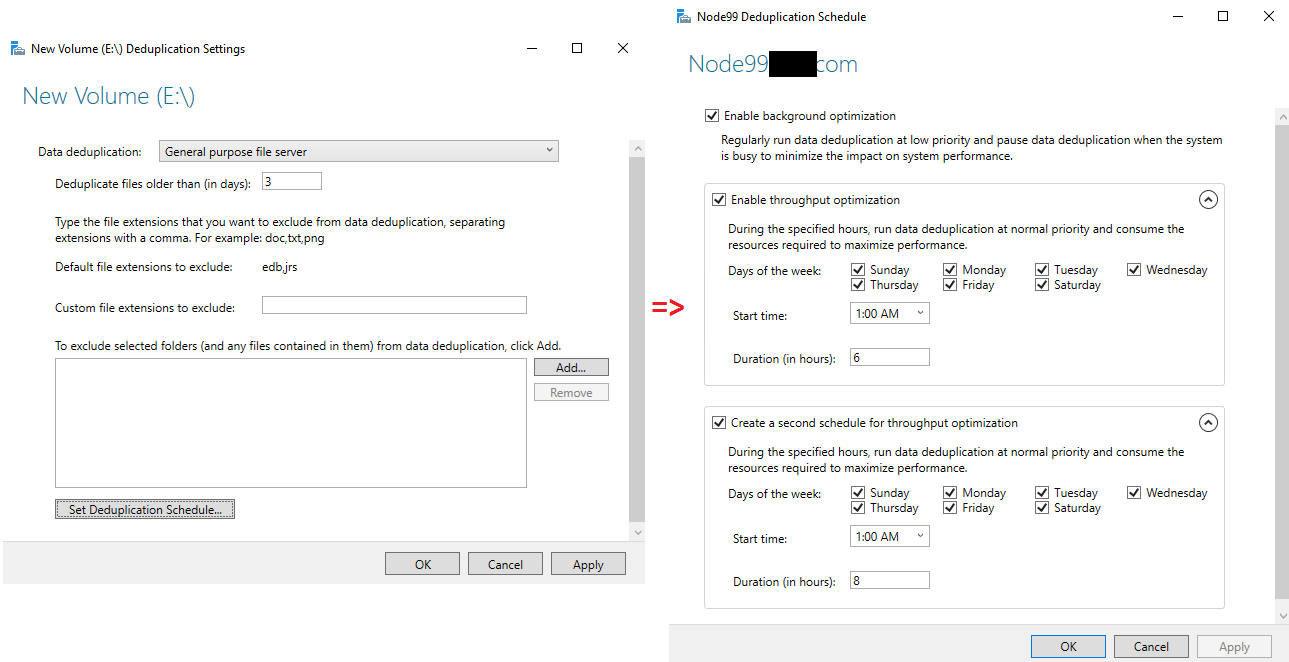
Deduplication was run automatically according to the schedule set.
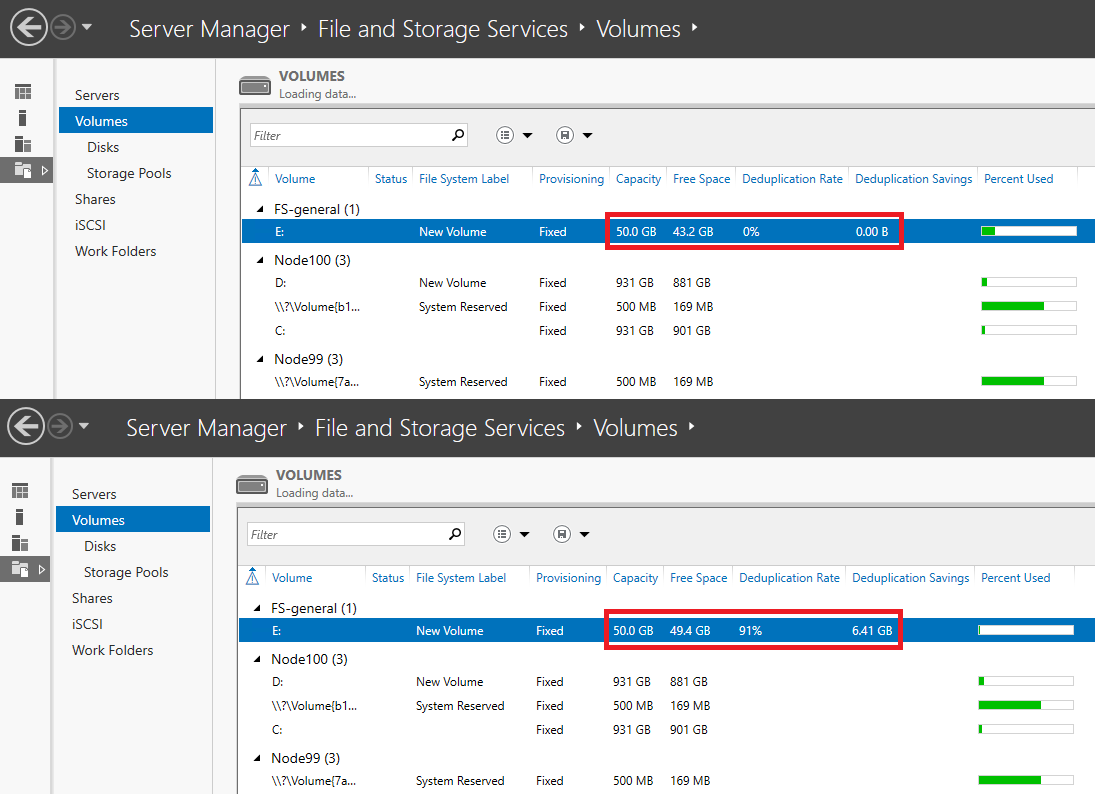
OK, let’s compare the storage size before and after deduplication.
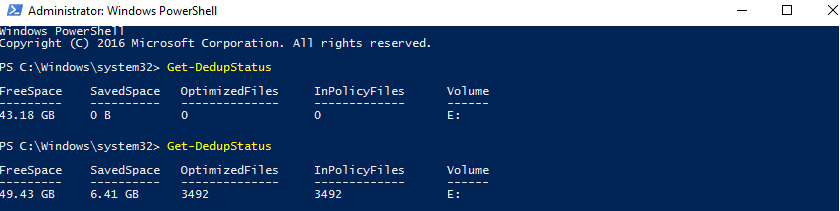
The same comparison but this time in PowerShell.
So, StarWind Deduplication Analyzer estimated deduplication ratio of 6.69 GB as 94.52%.
But after first optimization, the deduplication ratio was 91%, thus freeing 6.41GB of disk space. 3% difference? Quite precise if you ask me.
NOW LET’S GO ON TO THE SECOND PART AND CREATE A SCALE-OUT FILE SERVER
For that purpose, we need at least three disks.
I’ve created 3 HA devices In StarWind Management Console.
After that, I need to connect iSCSI targets in iSCSI Initiator.
Next, initialize the disks as MBR in Disk Management.
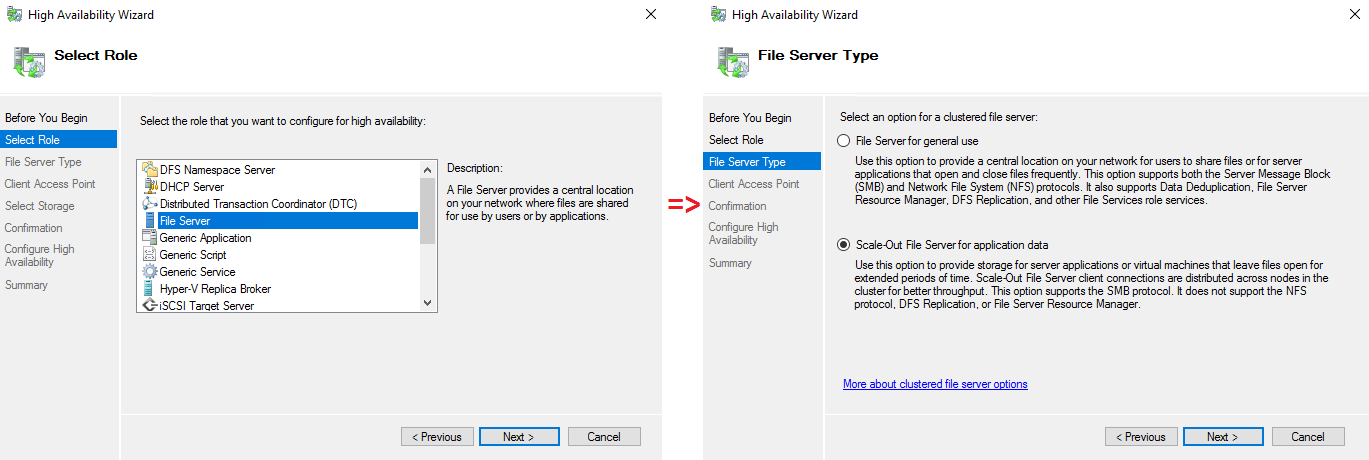
In the Role tab, configure the file server role with Scale-Out File Server type.

Select the role and the File Server type.
Select the name and confirm the file server creation.
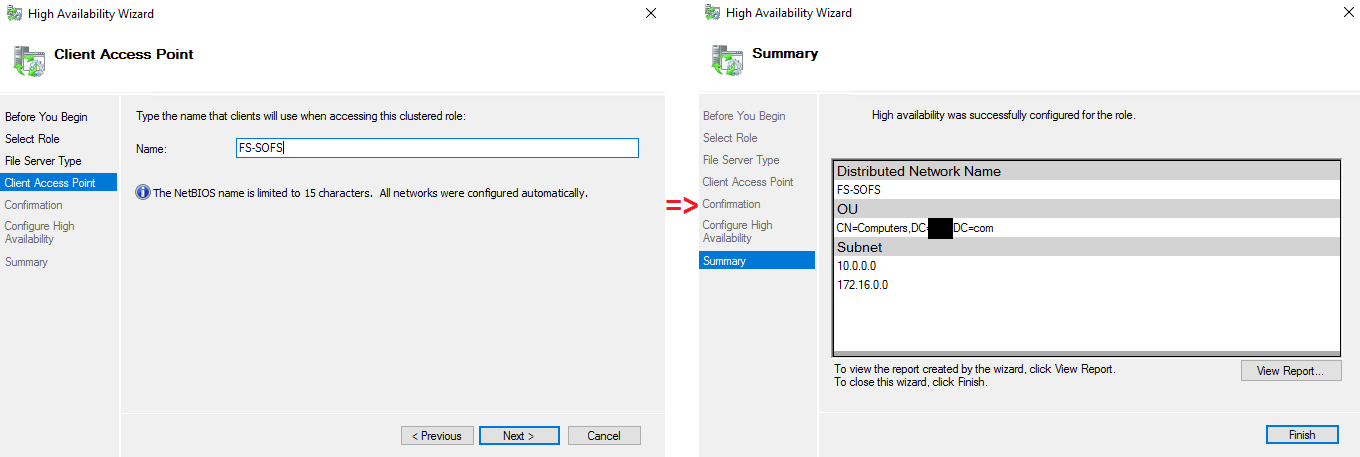
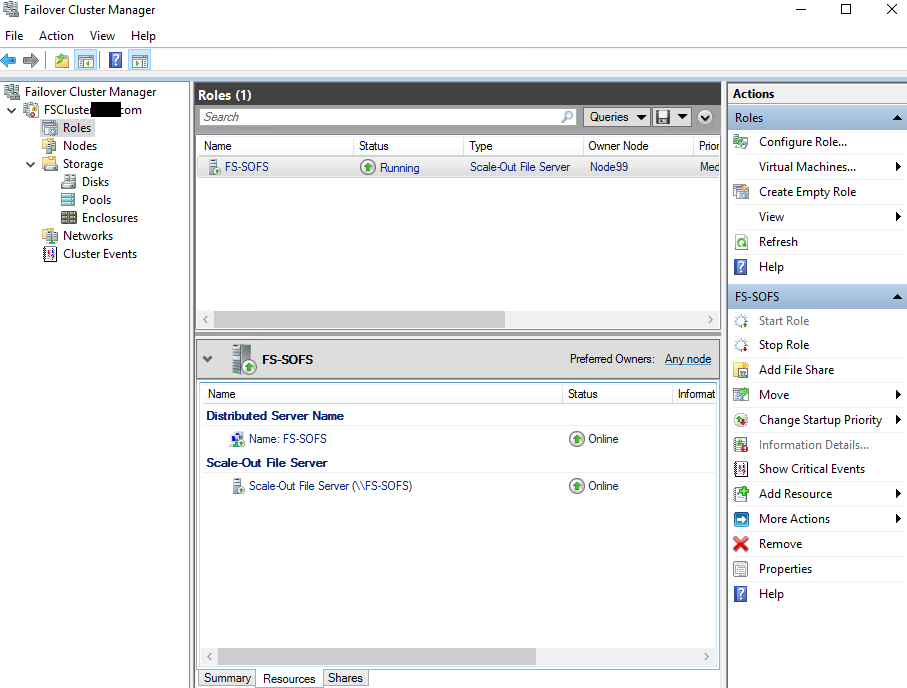
Here is the result.
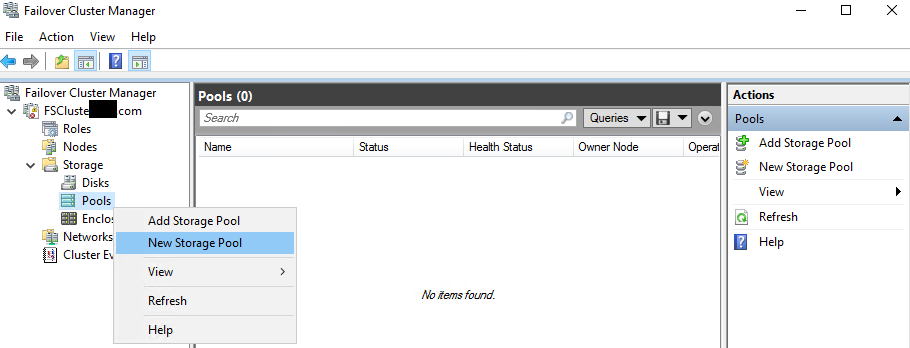
Now, right-click the Pools tab and choose “New Storage Pool”.
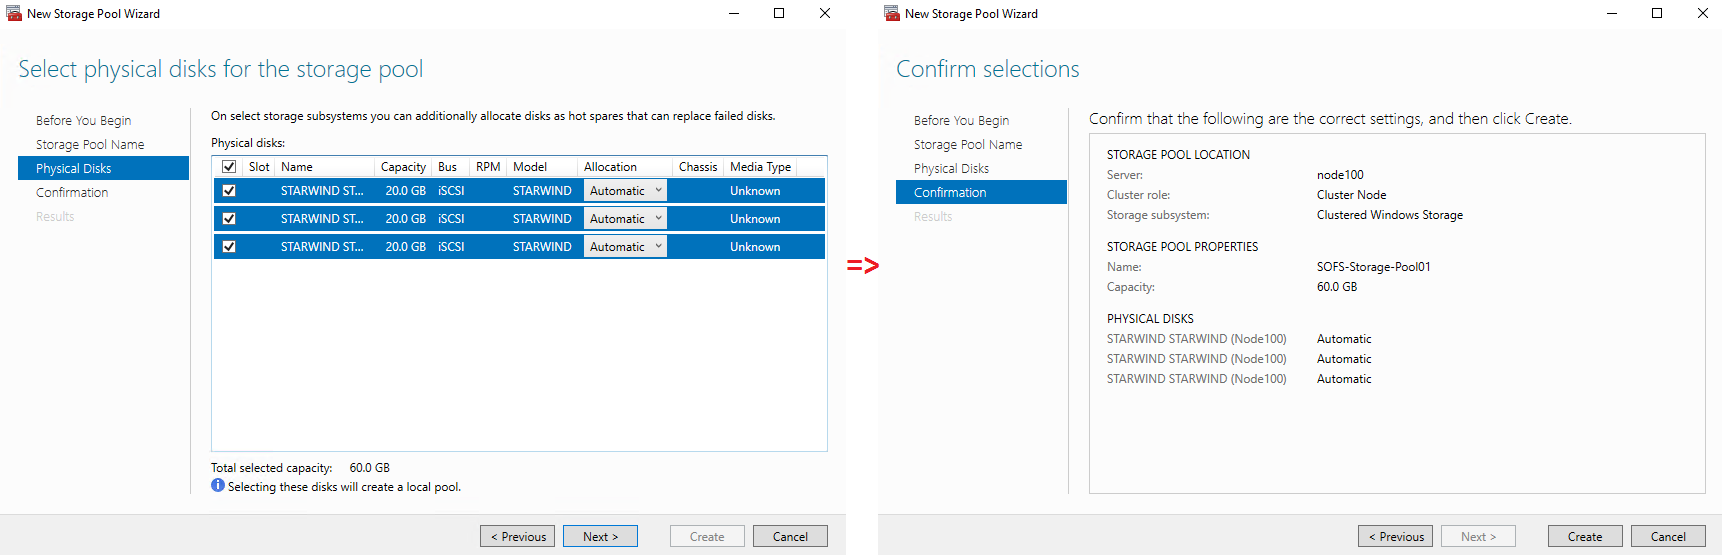
Select the disks and confirm the storage pool configuration.
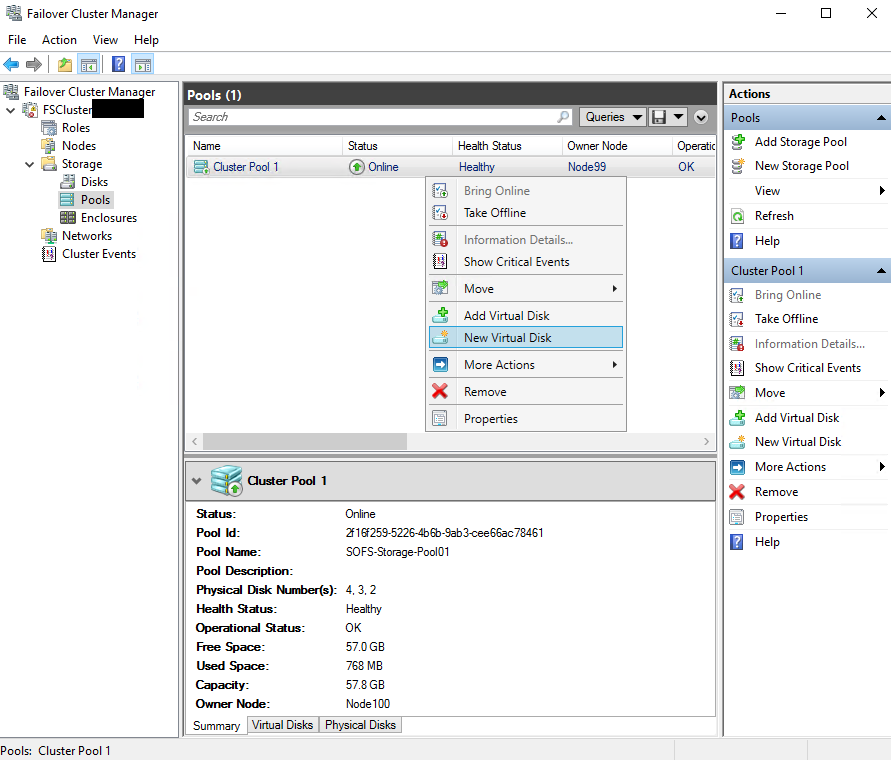
After creating the cluster pool, add the virtual disk.
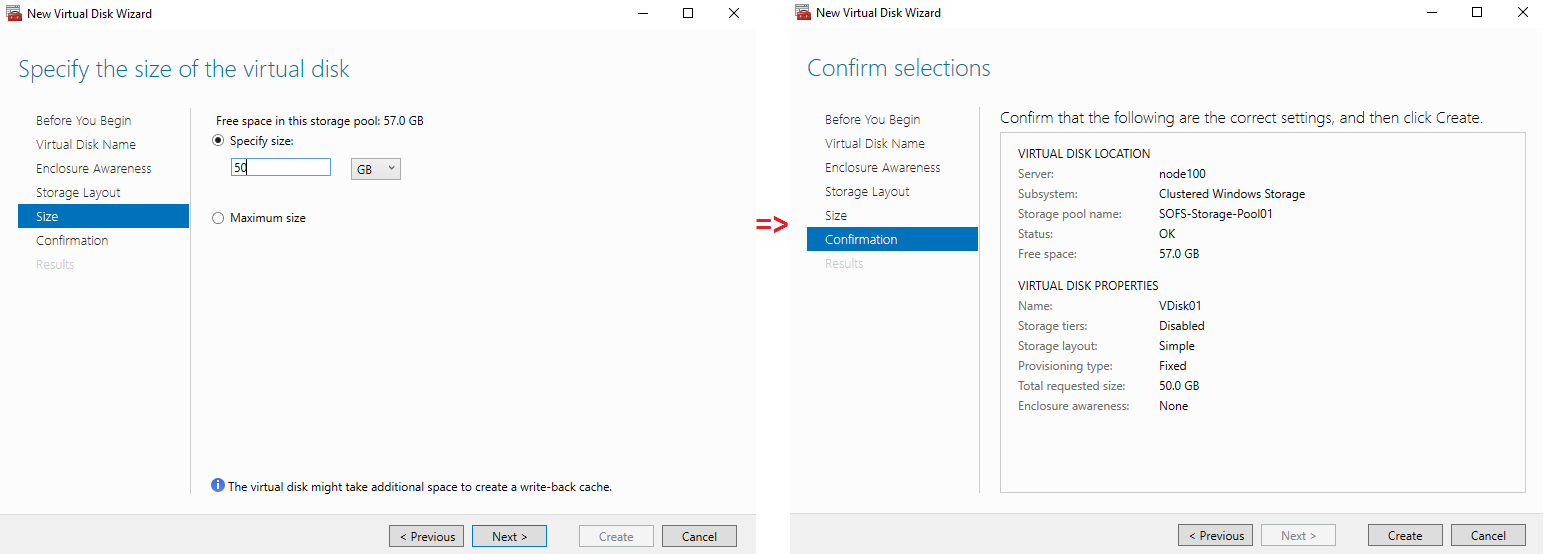
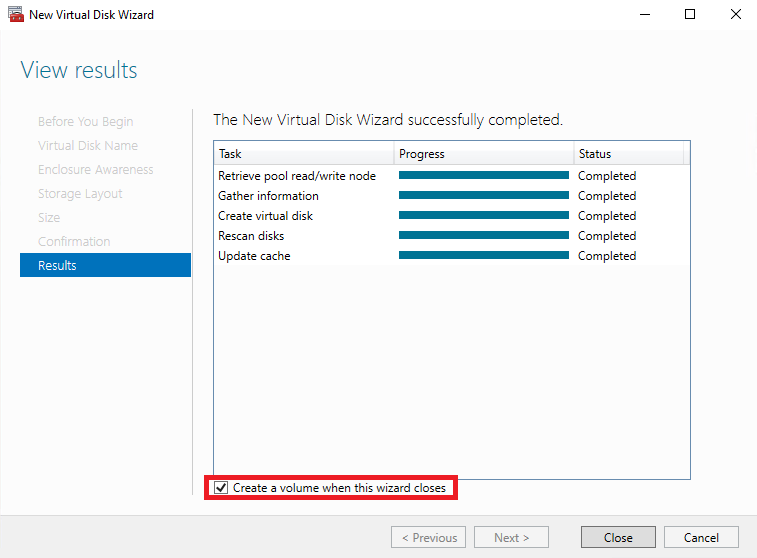
Next, set the size and confirm the virtual disk settings.
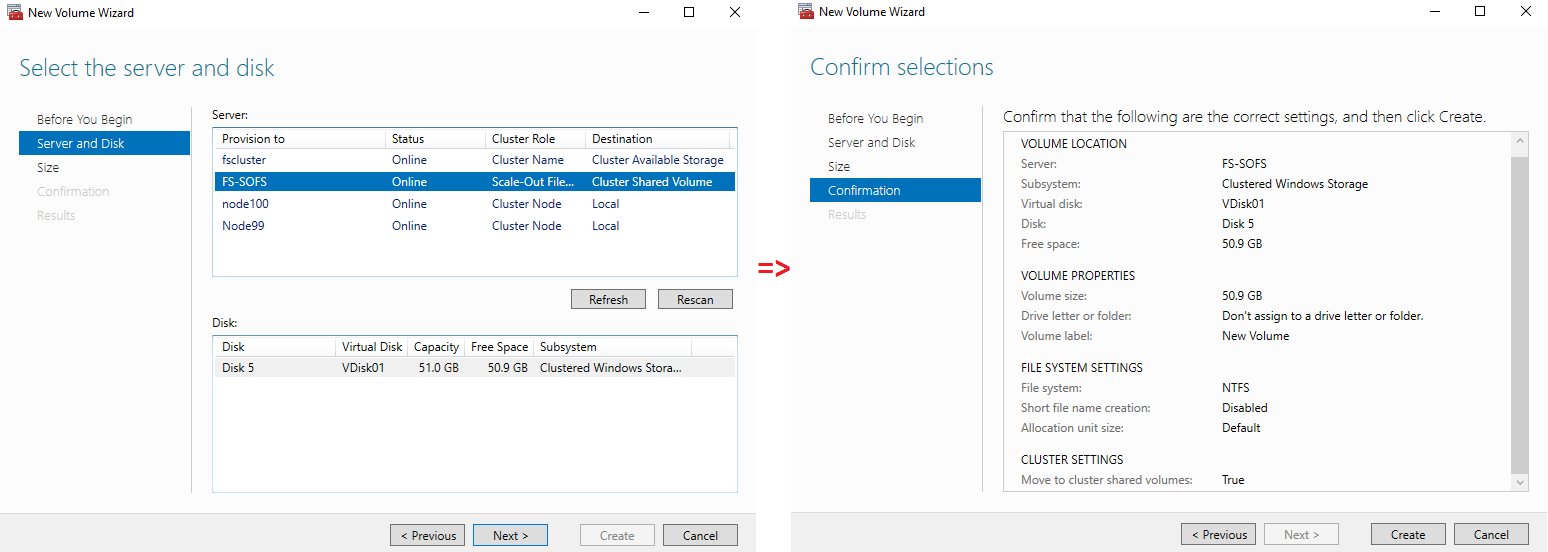
Now, let’s create the volume.
Select the server, disk and confirm the volume settings.
After that, add a file share.
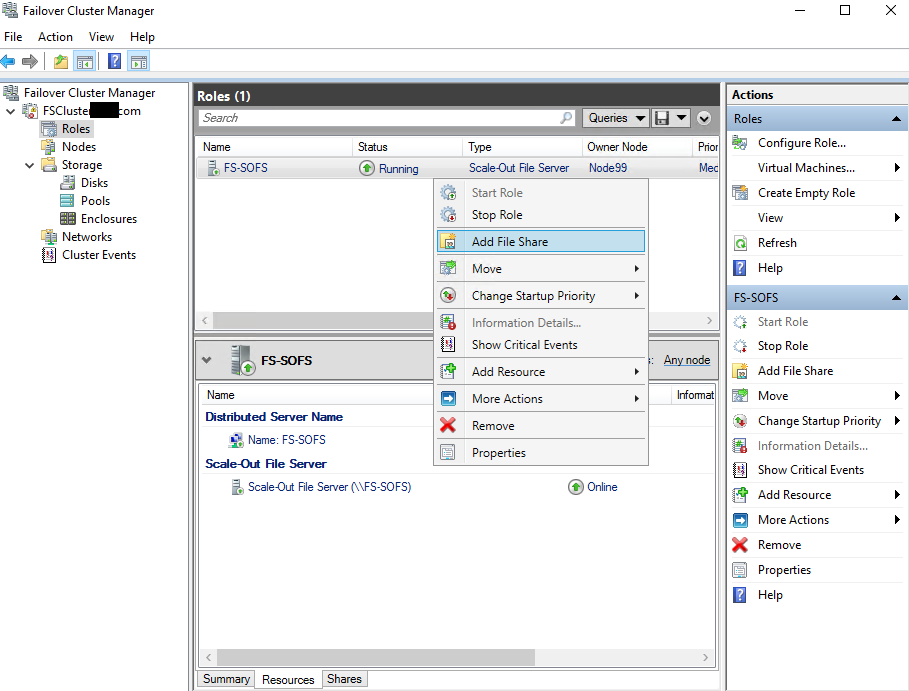
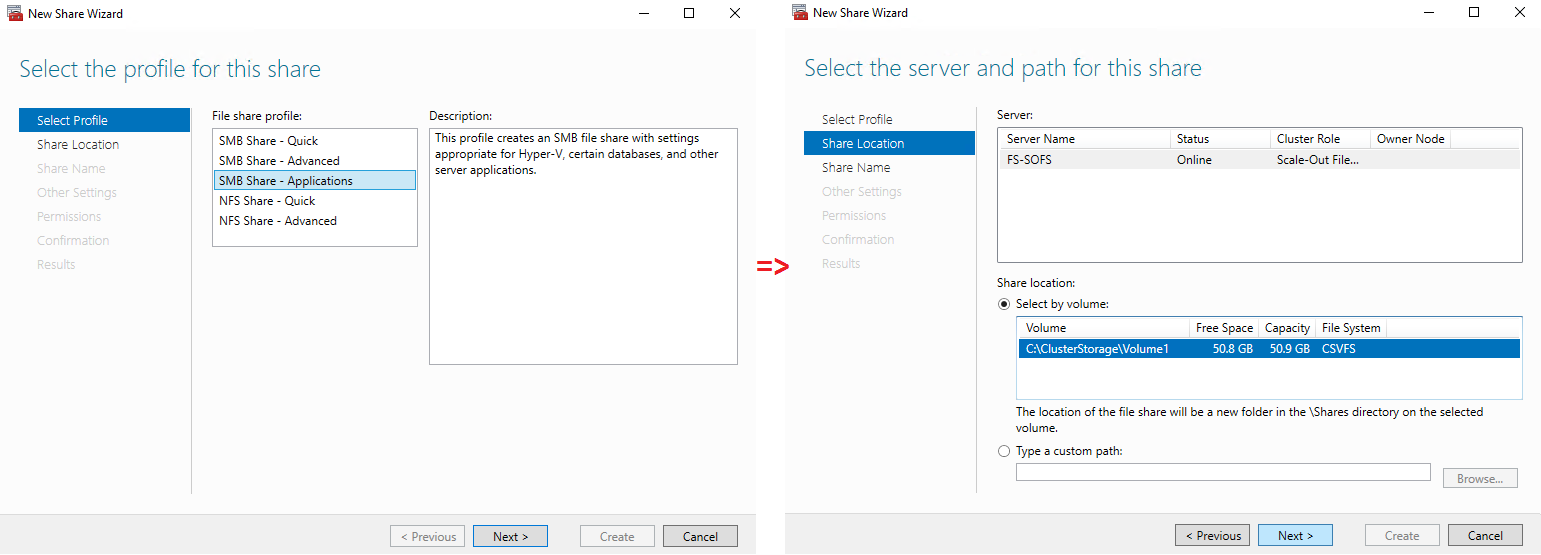
The next step is to select the profile and the file share location.
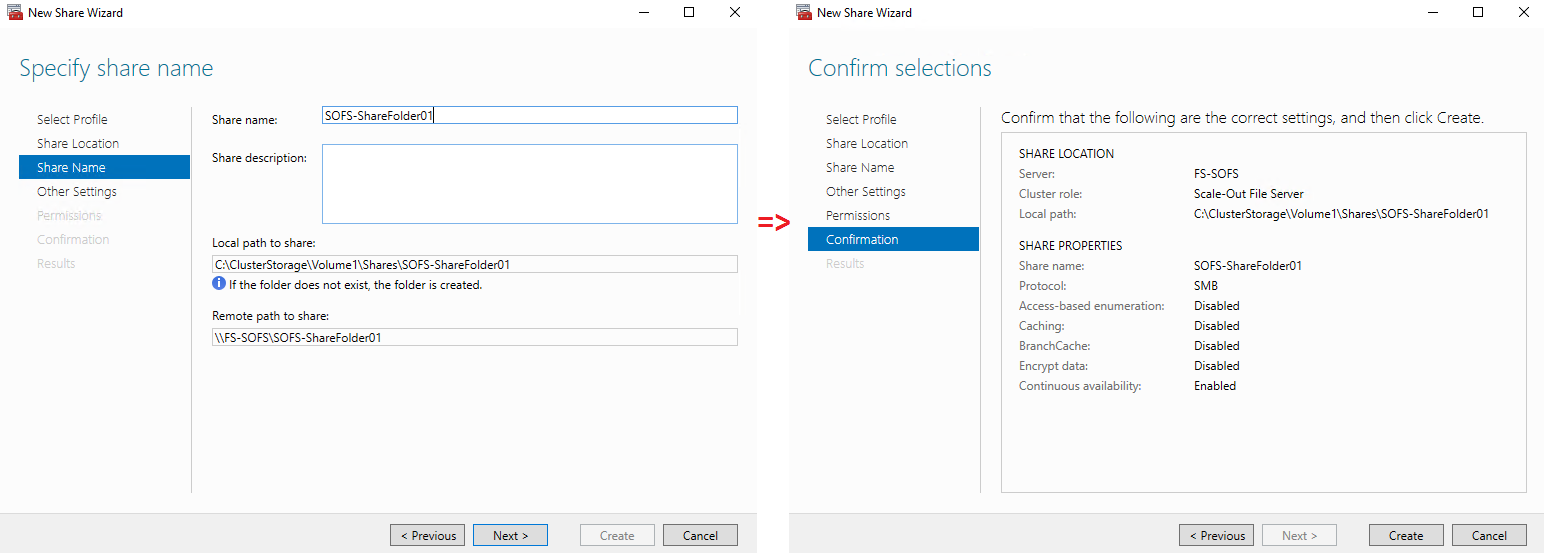
Select the share name and confirm the settings.
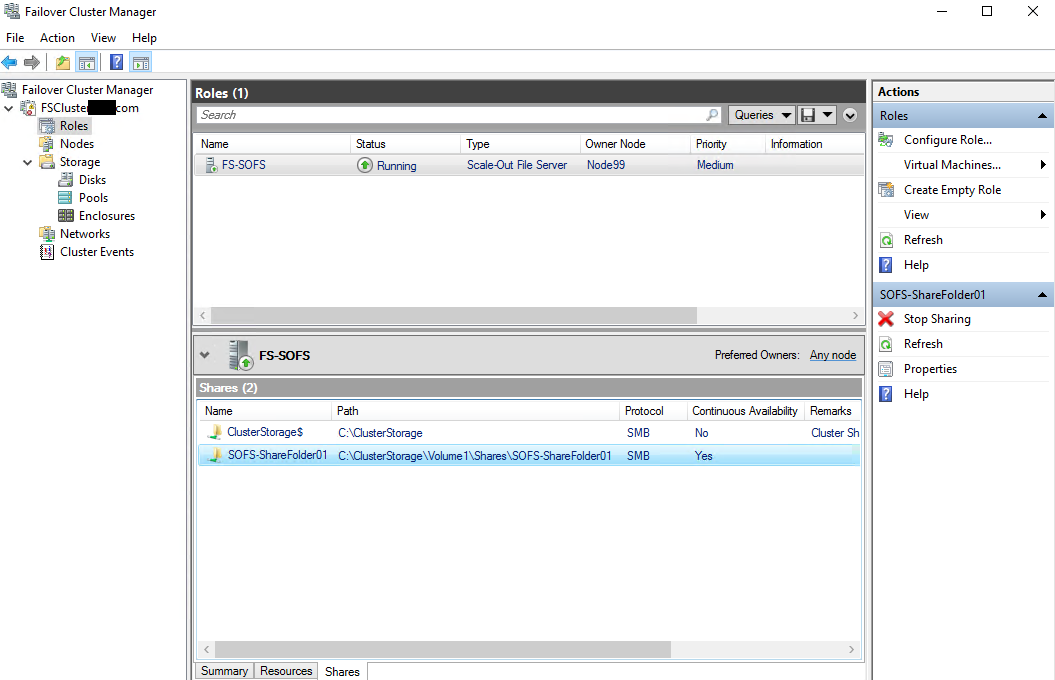
Here is what we get the result.
Now, connect to Scale-Out File Server over the network.
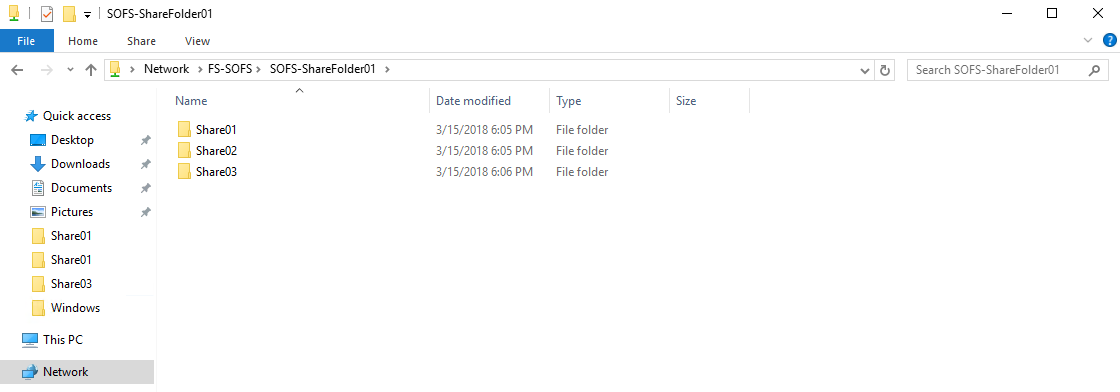
DEDUPLICATION
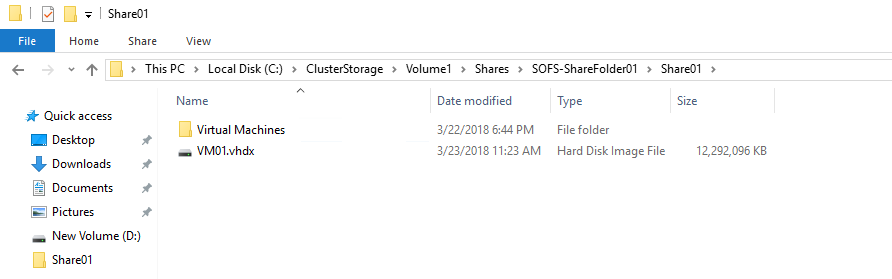
Prior to enabling deduplication on the File server, I’ve placed two VMs (created in Hyper-V Manager) in the shared folder.
The deduplication test was held under two scenarios:
VMs running
VMs turned off
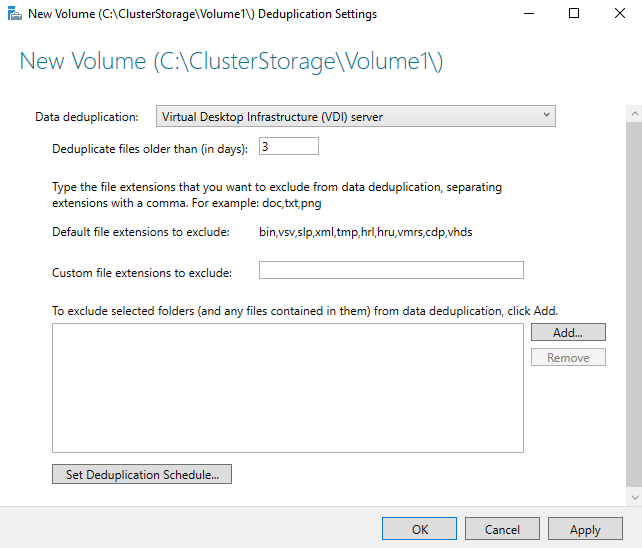
CONFIGURING DATA DEDUPLICATION
For VMs deduplication, I’ve used Virtual Desktop Infrastructure (VDI) server mode. Data Deduplication is configured in Server Manager: Server Manager => File and Storage Services => Volumes.
Scenario 1 (VMs running)
First, let’s analyze the deduplication outcome with StarWind Deduplication Analyzer.
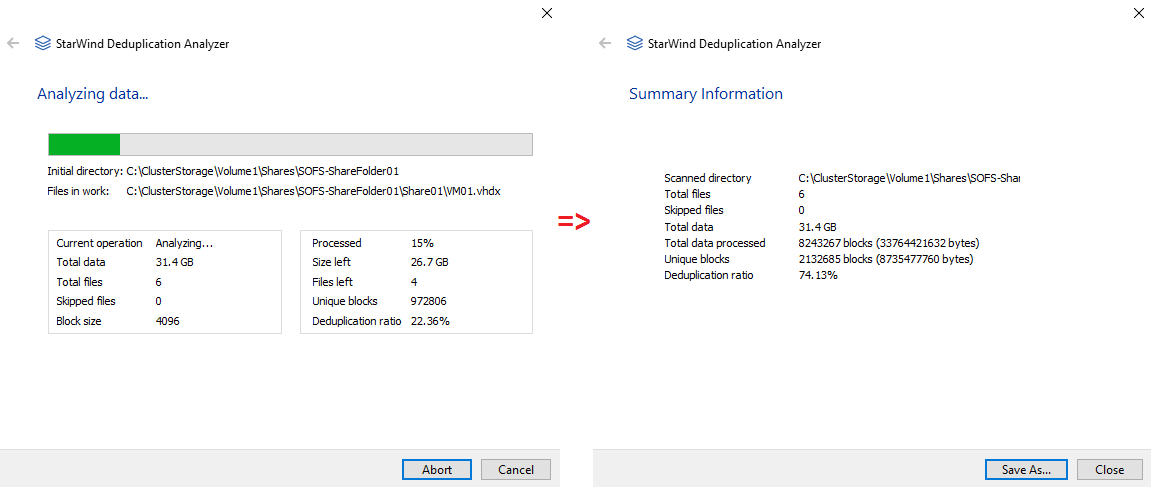
As you can see from the screenshot above, the tool calculated the deduplication ratio of 31.4 GB as 74.13%.
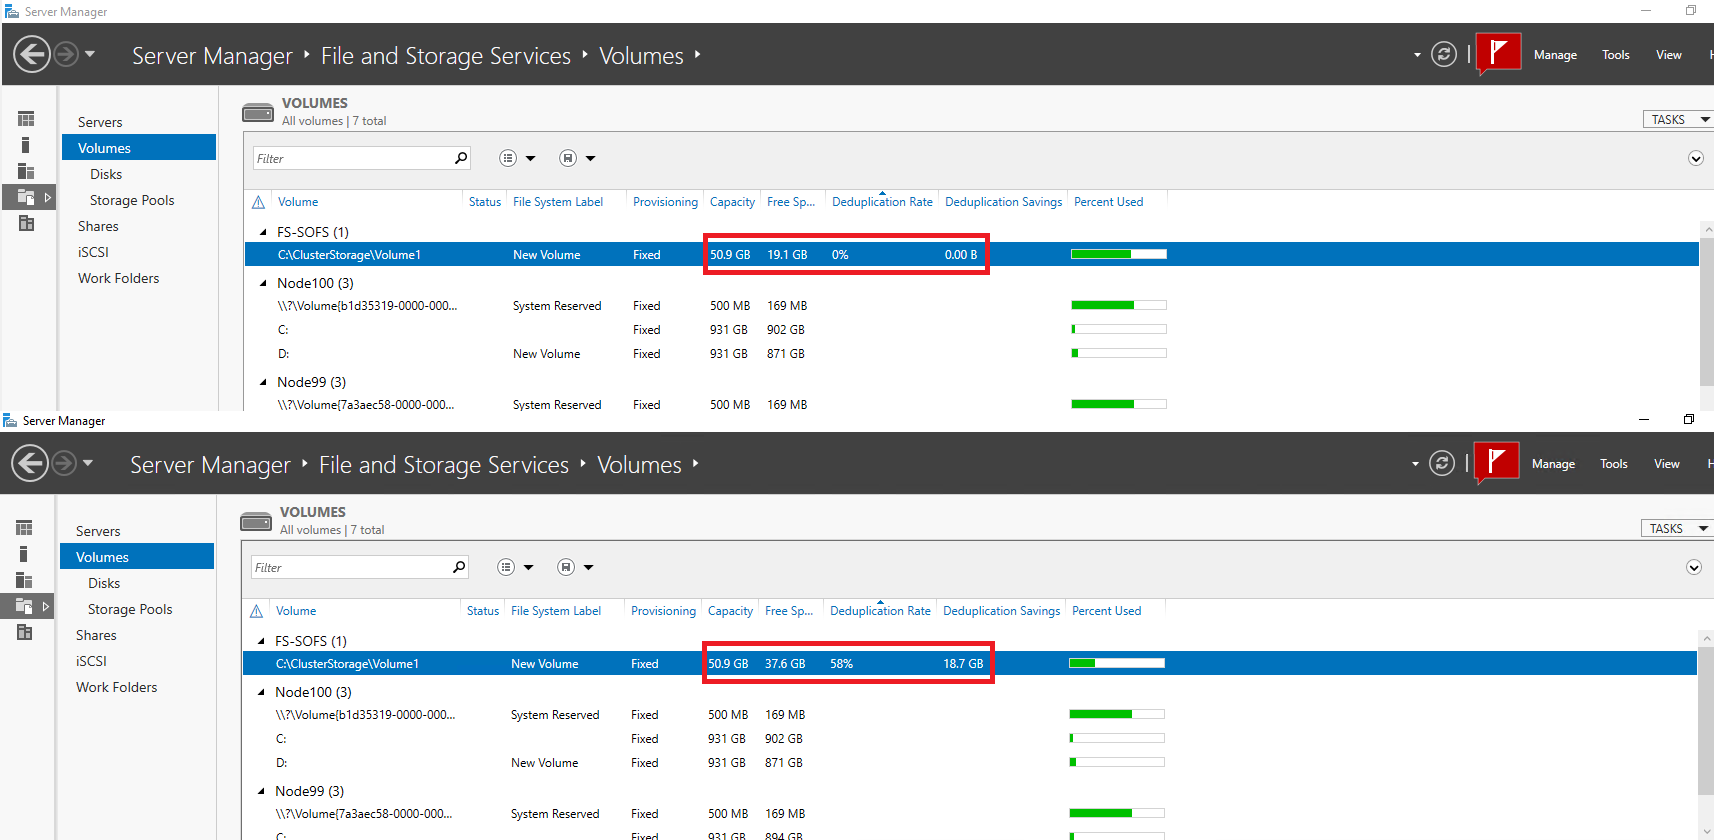
Once again, let’s take a look at how the storage size has changed after deduplication in Server Manager.
That’s how it looks in PowerShell.
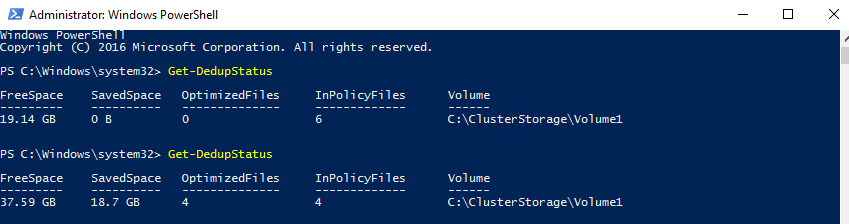
The deduplication ratio 58% so we’ve managed to free up 18.7GB of disk space.
Scenario 2. VMs turned off
As usual, I first measure the deduplication ratio with StarWind Deduplication Analyzer.

As you can see, StarWind Dedup Analyzer estimated the deduplication ratio for 23.4 GB as 65.68%.
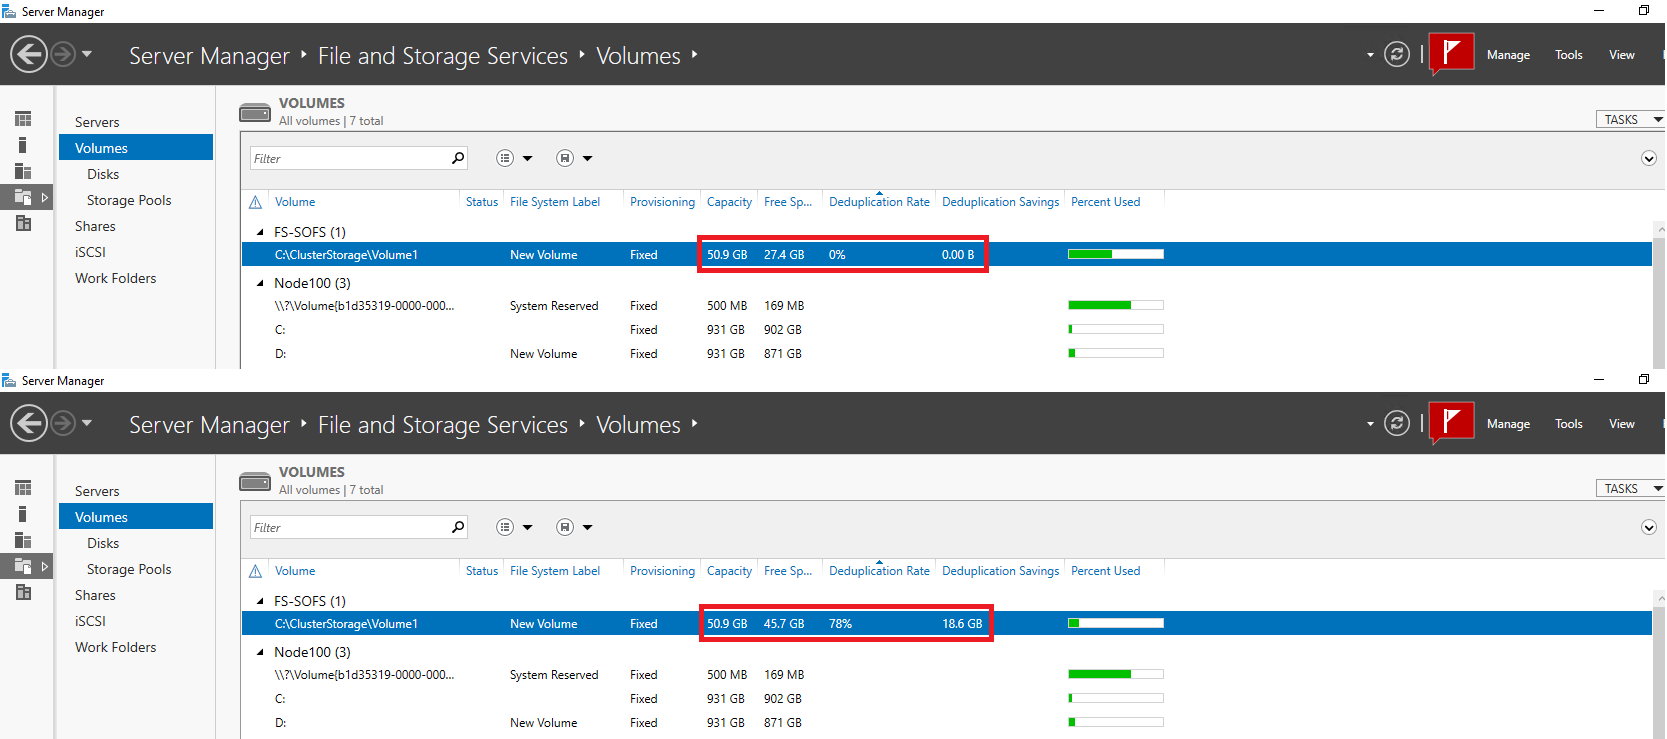
Let’s compare how storage size has changed after deduplication in Server Manager…
…and PowerShell.
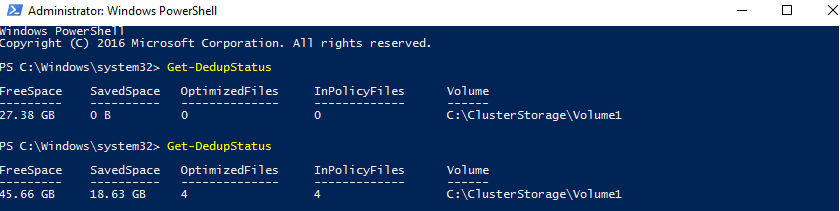
So, we’ve managed to free up 78% – 18.6GB of disk space thanks to deduplication.
CONCLUSION
So, let’s take a look at the numbers once again. I’ve created two types of a file server: “File server for general use” and Scale-Out File Server. I’ve analyzed the deduplication ratio with StarWind Deduplication Analyzer tool and performed data deduplication.
Under the “File server for general use” scenario, StarWind Dedup Analyzer estimated the deduplication ratio as 94.52% while the actual result was 91% which allowed us to gain 6.41GB of free disk space.
Under the Scale-Out File Server scenario, we’ve investigated two options: VMs running and turned off.
When VMs were running, the StarWind tool showed the dedup ratio as 74.13% and the actual result was 58% – 18.7GB of free disk space.
With VMs off, StarWind Deduplication Analyzer gave 65.68% prediction for dedup ratio and the real deduplication result was 78% – 18.6GB disk space acquired.
Well, we can see that the VMs state does not affect the deduplication outcome as in both cases, the amount of storage space gained was practically identical. Overall, the smallest deduplication ratio was 58% (18.7GB) so it’s still a profit. To conclude, deduplication really helps to free some disk space for your file server, so if you still have any doubts considering its benefits, leave them behind.
